Created upon request of johnp.
Difficulty level: Ultra-Beginner Blender Users. If you have any trouble following the tutorial, contact me, I’m happy to help.
No blender skills are expected except basic view port navigation. Photoshop or gimp skills are needed.
This tutorial is indented for graphic designers interested in using blender to create renders of branded stationery.
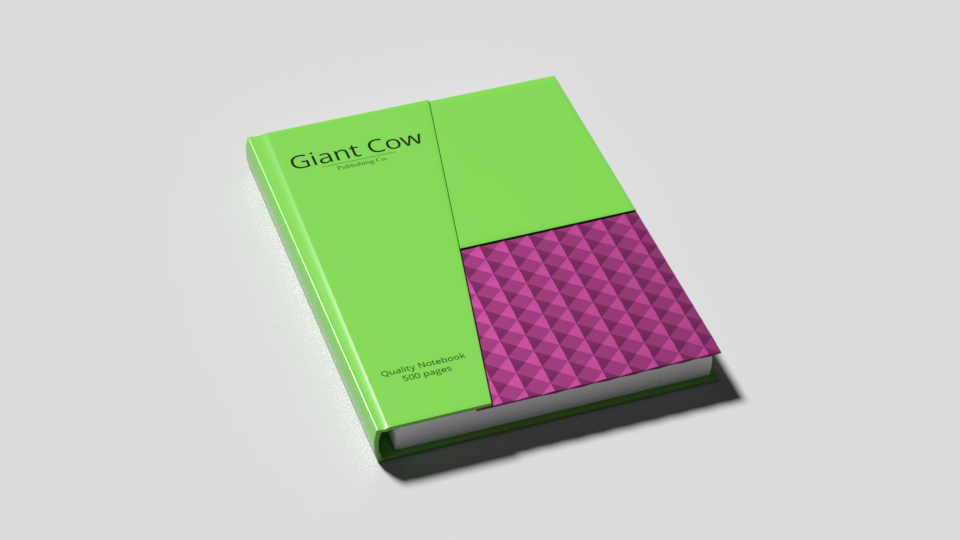
To demonstrate the basic techniques used to create product renders for stationery and similar products, an example of creating a simple render of a decorative notebook will be used.
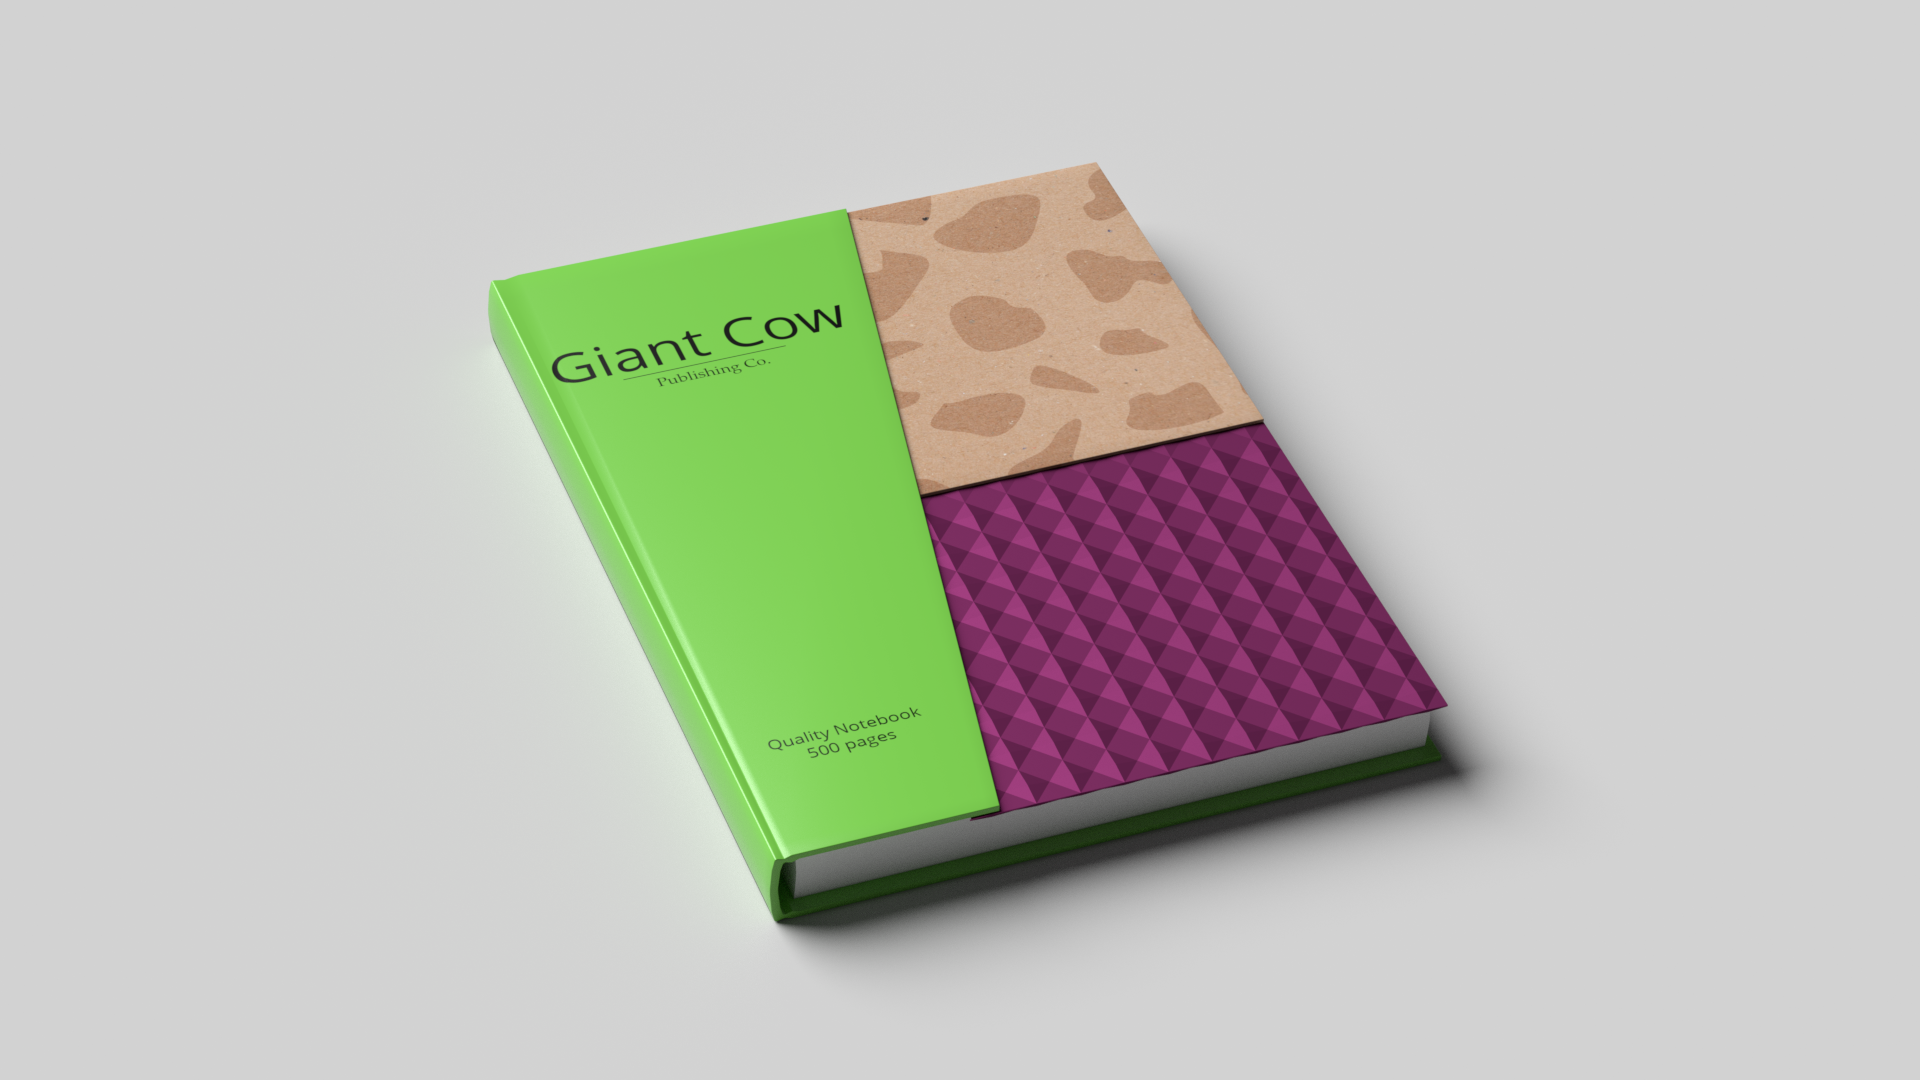
Part One: Modeling
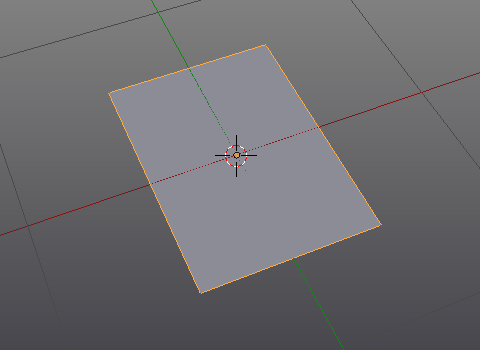
To begin modeling the notebook, add a plane Shift–A > Mesh > Plane
To begin modeling the notebook, enter edit mode with Tab.
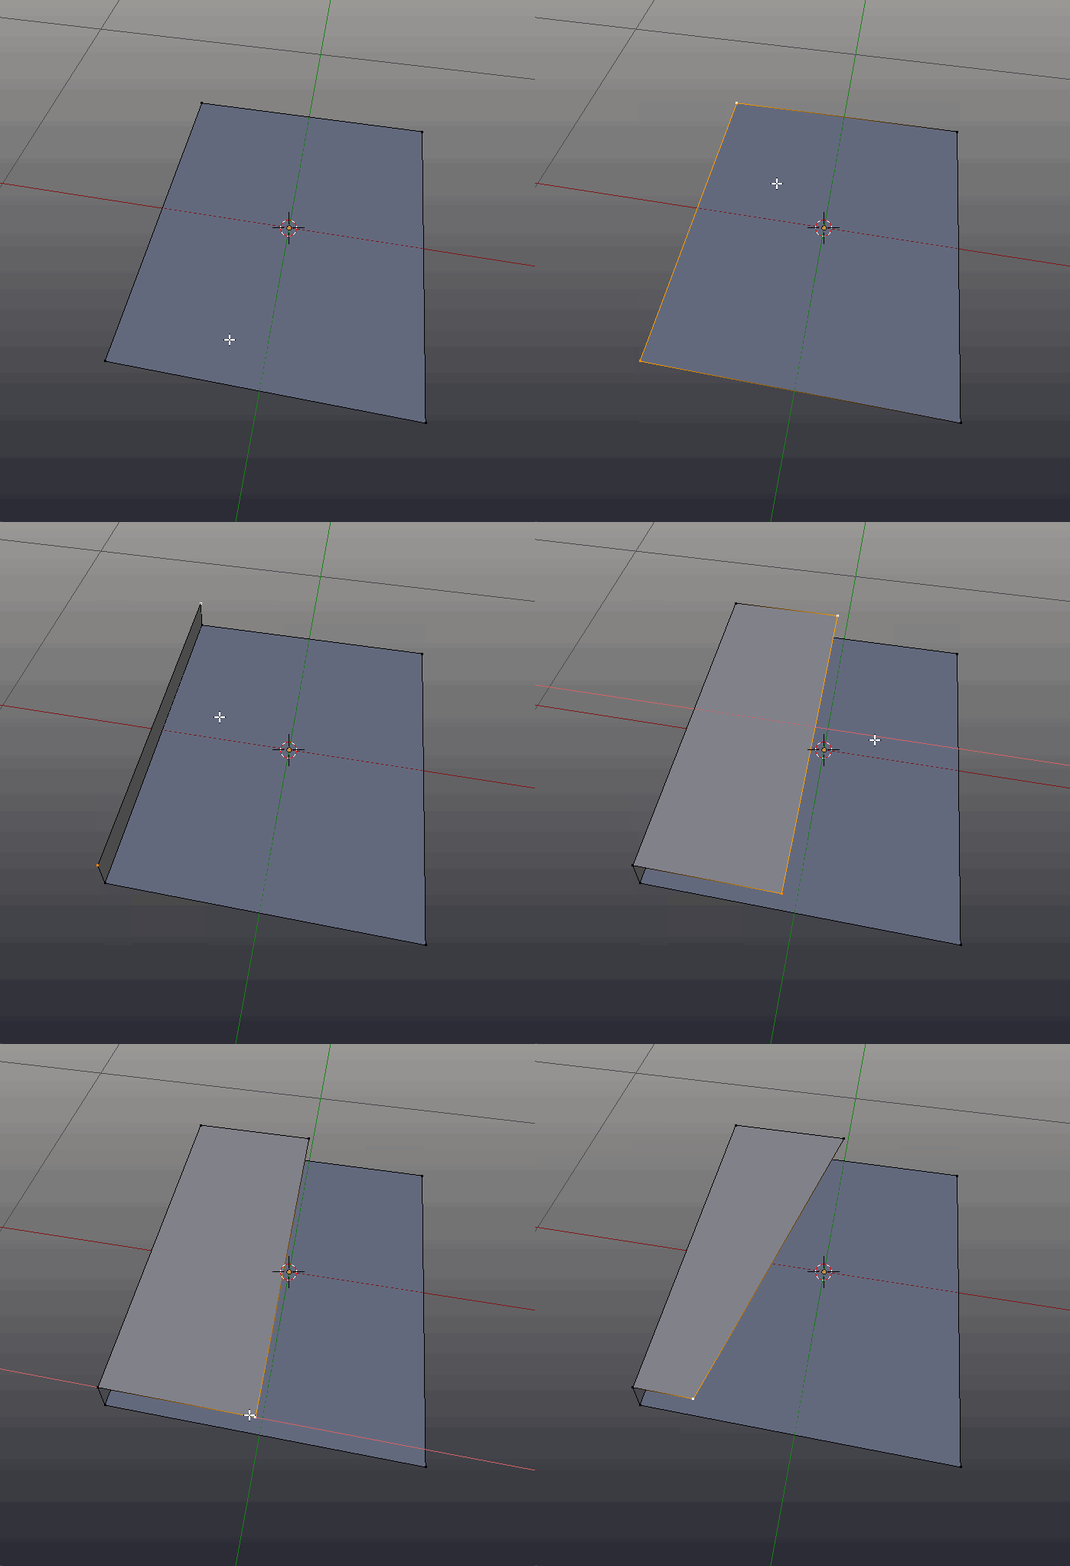
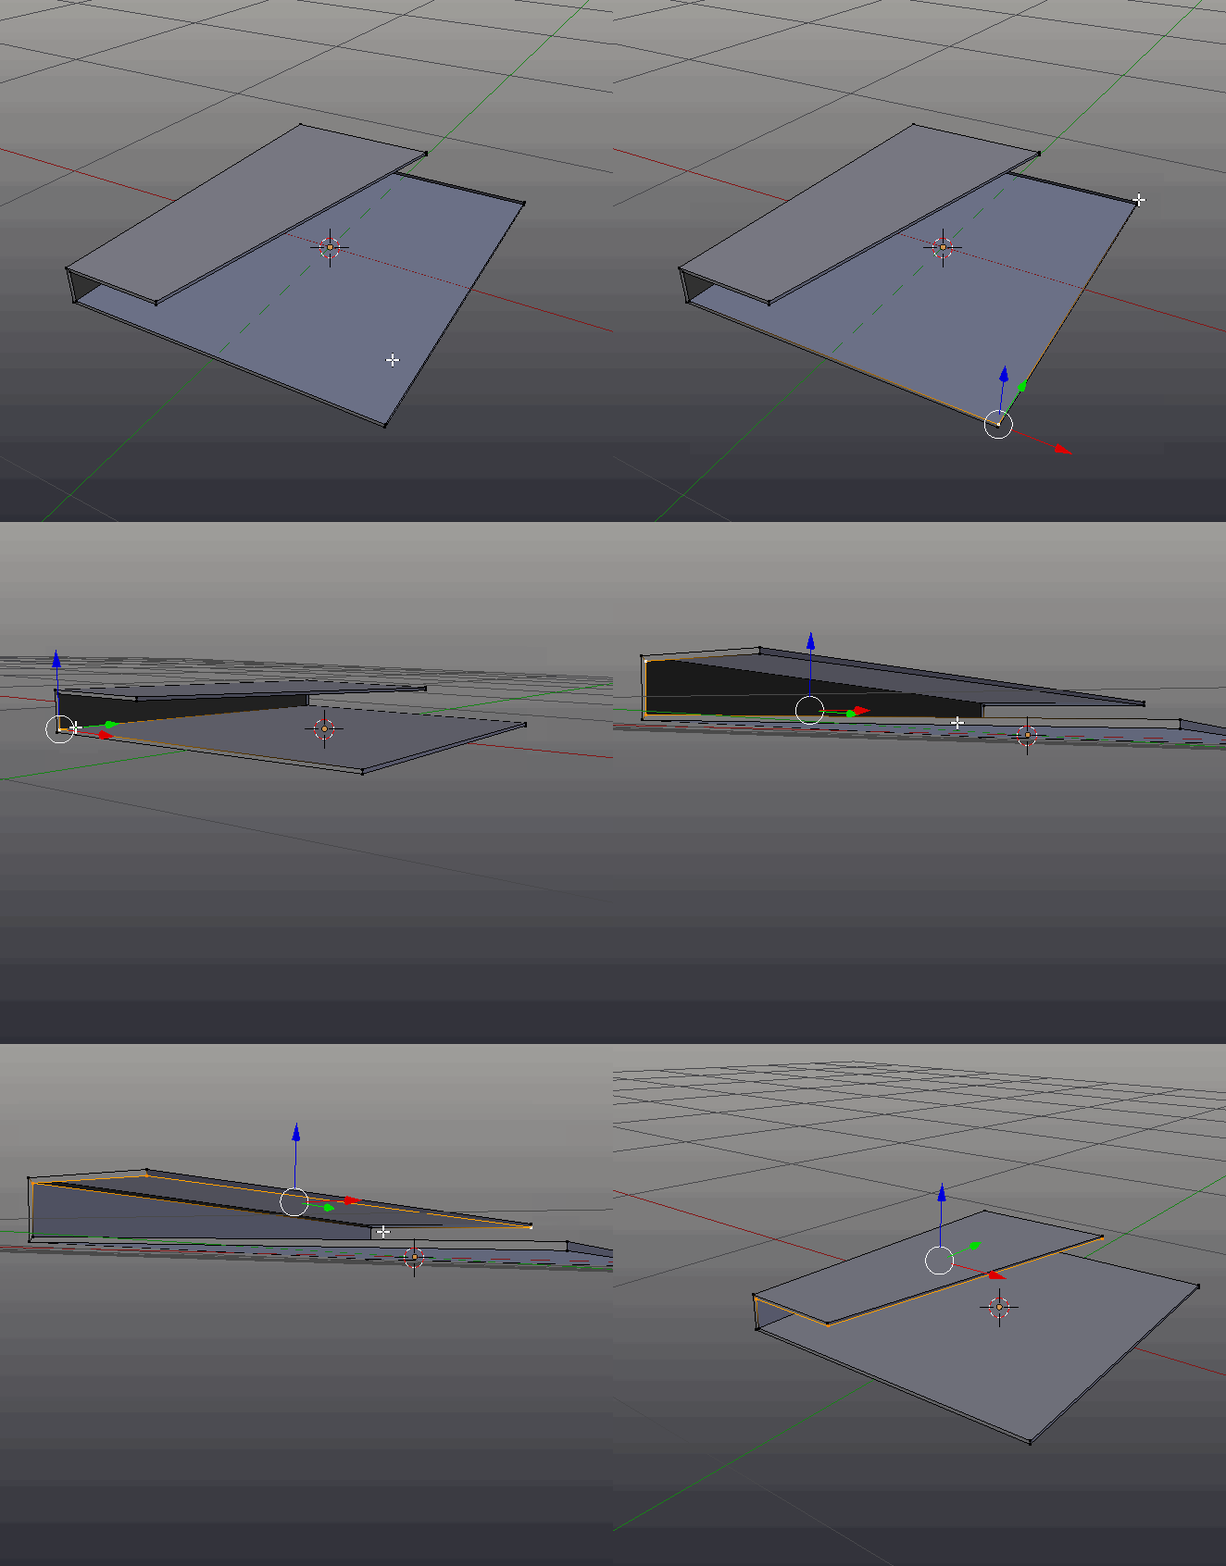
select all the vertices and scale the plane down slightly (S), and then scale it down some more on the x axis (S), (X).
next, using Shift-RMB (Shift adds to the selection), select the two vertexes along the spine side of the book, and extrude them upwards along the Z axis (E)(Z) to the desired thickness of the book. Extrude them out again, along the x axis (E)(X), to make the green partial panel on the front of the book. Select the bottom vertex, and slide it back (G)(X) in to make an angle. The result should look something like this:
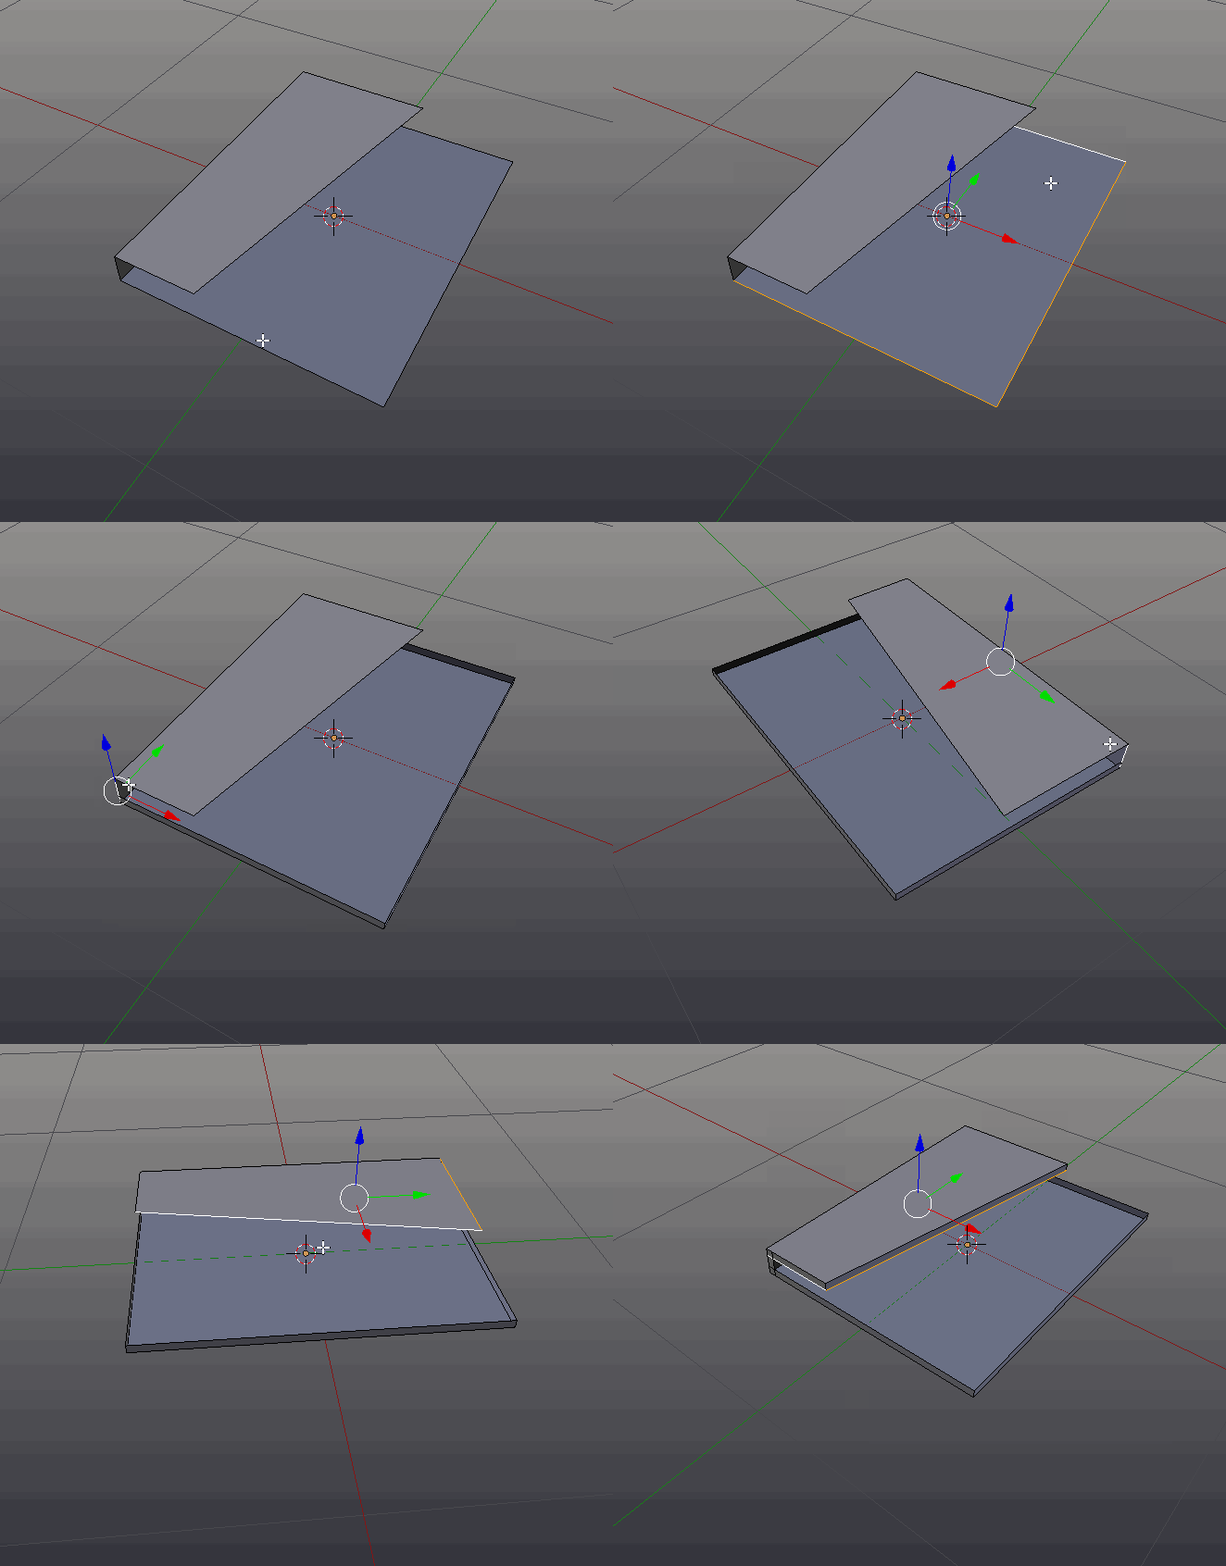
All paper has some thickness, and even if it is very thin, it is still important to model it correctly. In the case of the book cover, the paper is quite thick.
To add the thickness, select the vertexes along all the edges that will rise along a certain axis, and extrude those edges along that axis for the desired amount. For this purpose you may wish to use edge select mode.

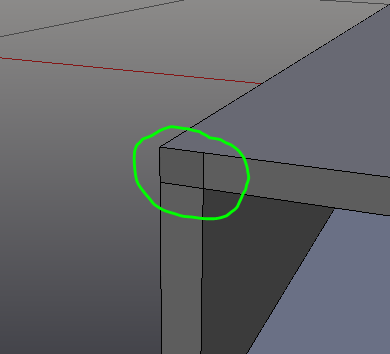
It is important to ensure that the final mesh is clean and easy to work with, so that the later detailing steps can be completed without a hassle. Therefore, the overlapping corners need to be joined:
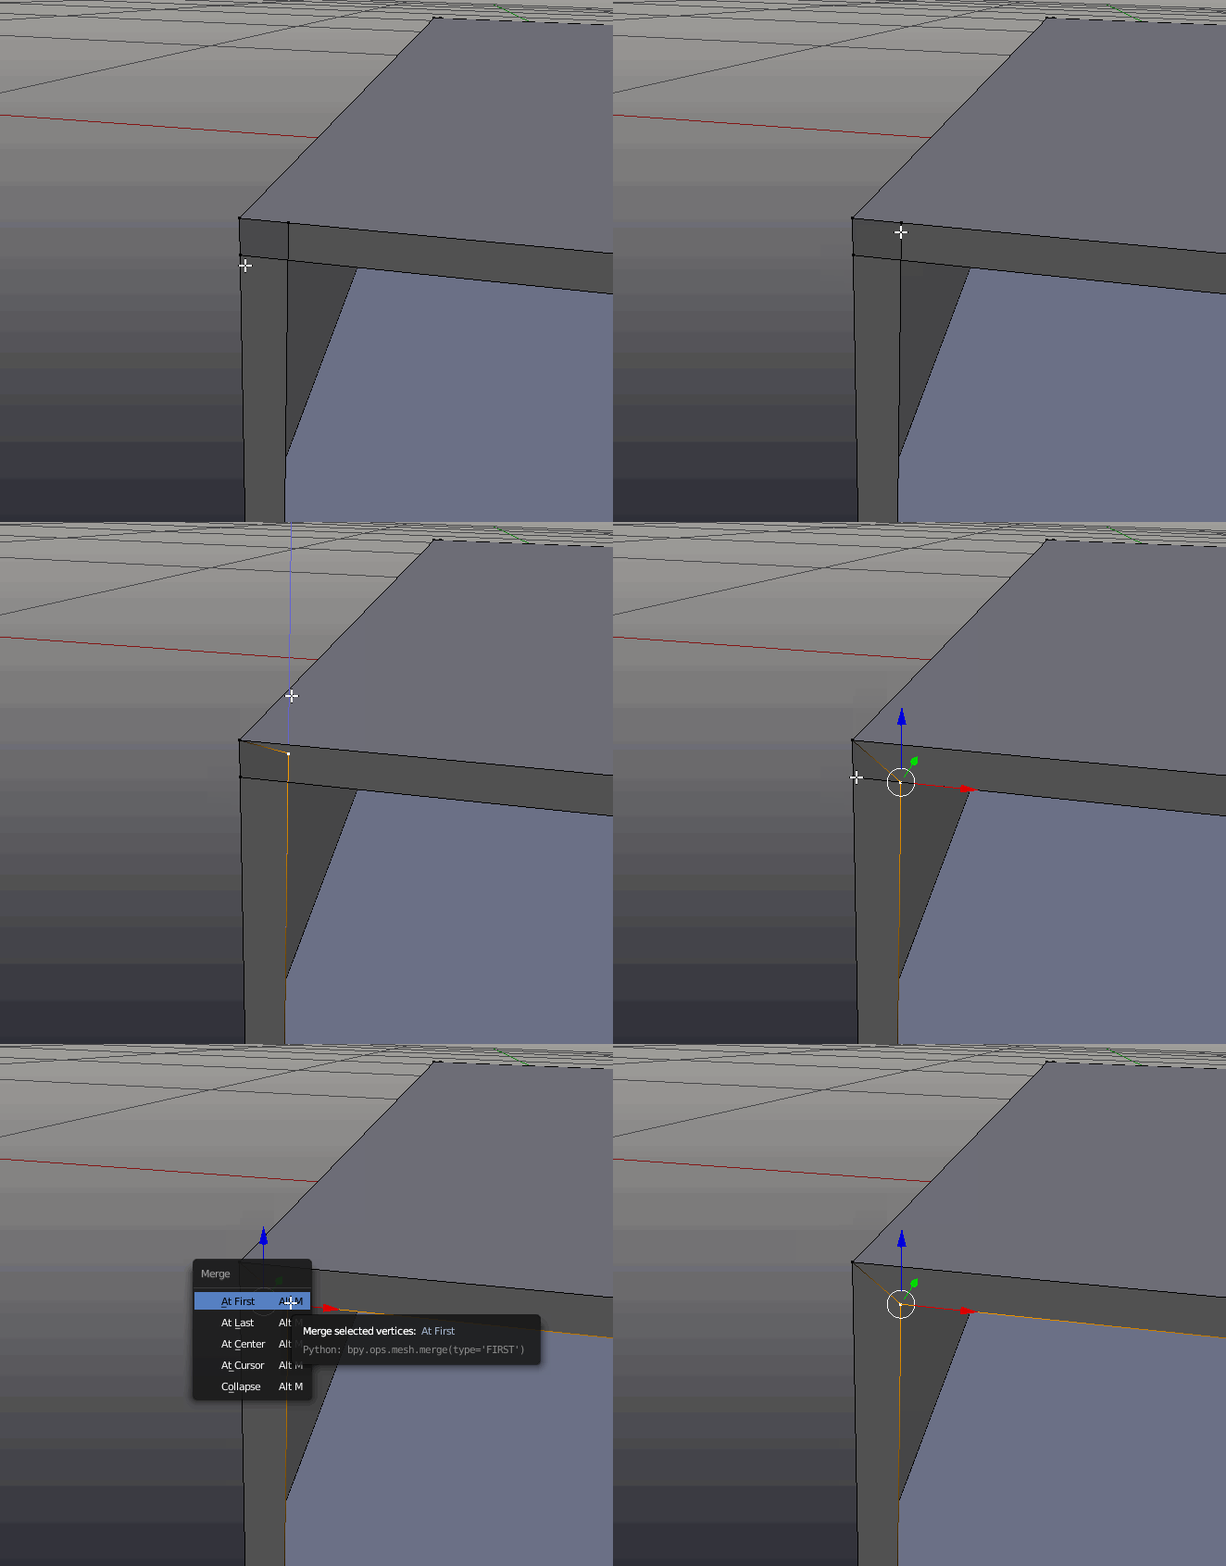
To achieve this result, switch into vertex mode, using the same selector that was used to switch into edge select mode.
Move the vertex of one of the edge over to where the other edge is. This task can be completed with more precision using vertex snapping, but that is not necessary.
Next, select the other vertex, and then select the moved vertex using Shift (so both are selected). Use (Alt)-(M)>At Last to join the two vertices. Repeat these steps for all the overlapping corners.
Now the back of the cover needs to be filled in. Select the four vertices that correspond to each of the interior faces, and hit (F) to make a face between them.
Now it is time to detail the cover, including adding a join and curve to the spine.
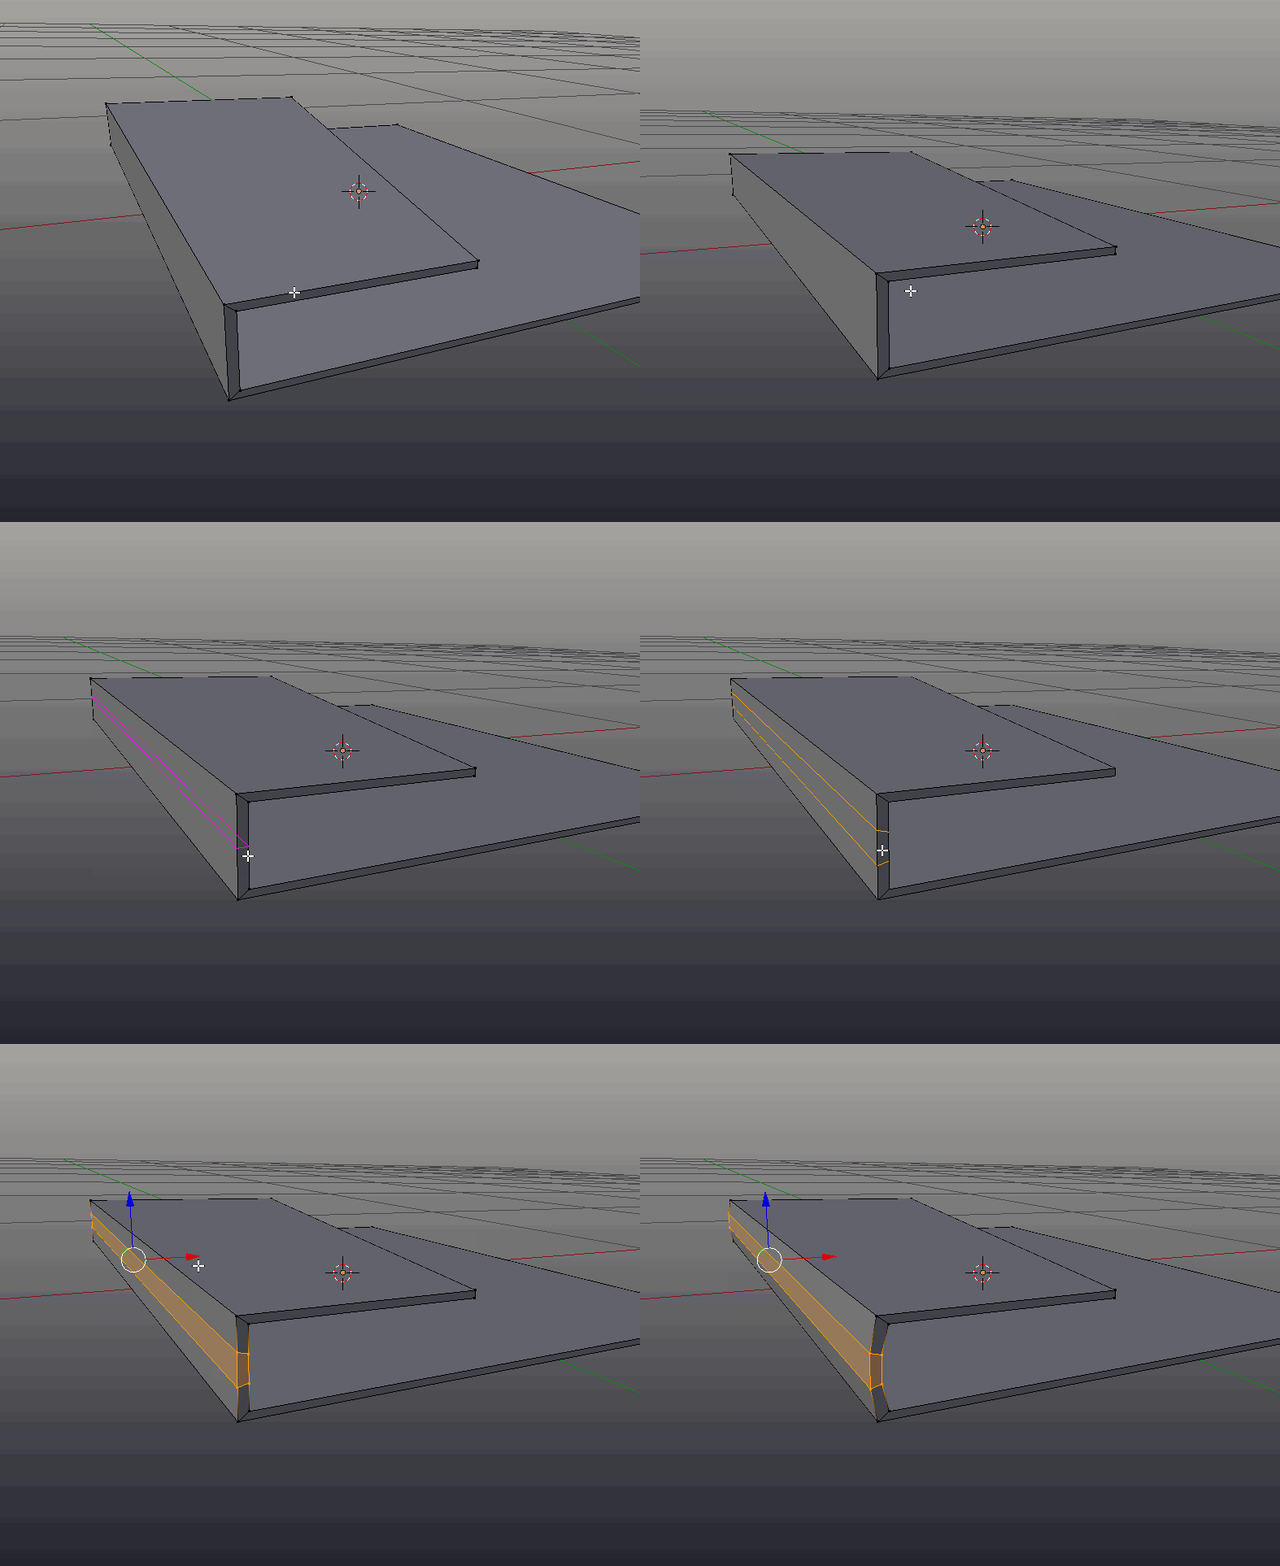
Begging with the curve, hover over the spine and hit (Ctrl)-(R), A purple line should appear parrellel to the spin. If it doesn’t move the cursor until it does. This can be a little fiddly. When the loop is in the correct place, use the scroll wheel to add another one, so there are two in total. LMB to confirm the change, then RMB to stop the loops from sliding. Two new loops of vertices will appear. Select them both (If they aren’t already selected), by Alt-RMB clicking on the first one, in the middle of the edge, and Shift-Alt-RMB selecting the other one. Finally, move them both slightly to the right of the book, to add a bit of curve to the spine.
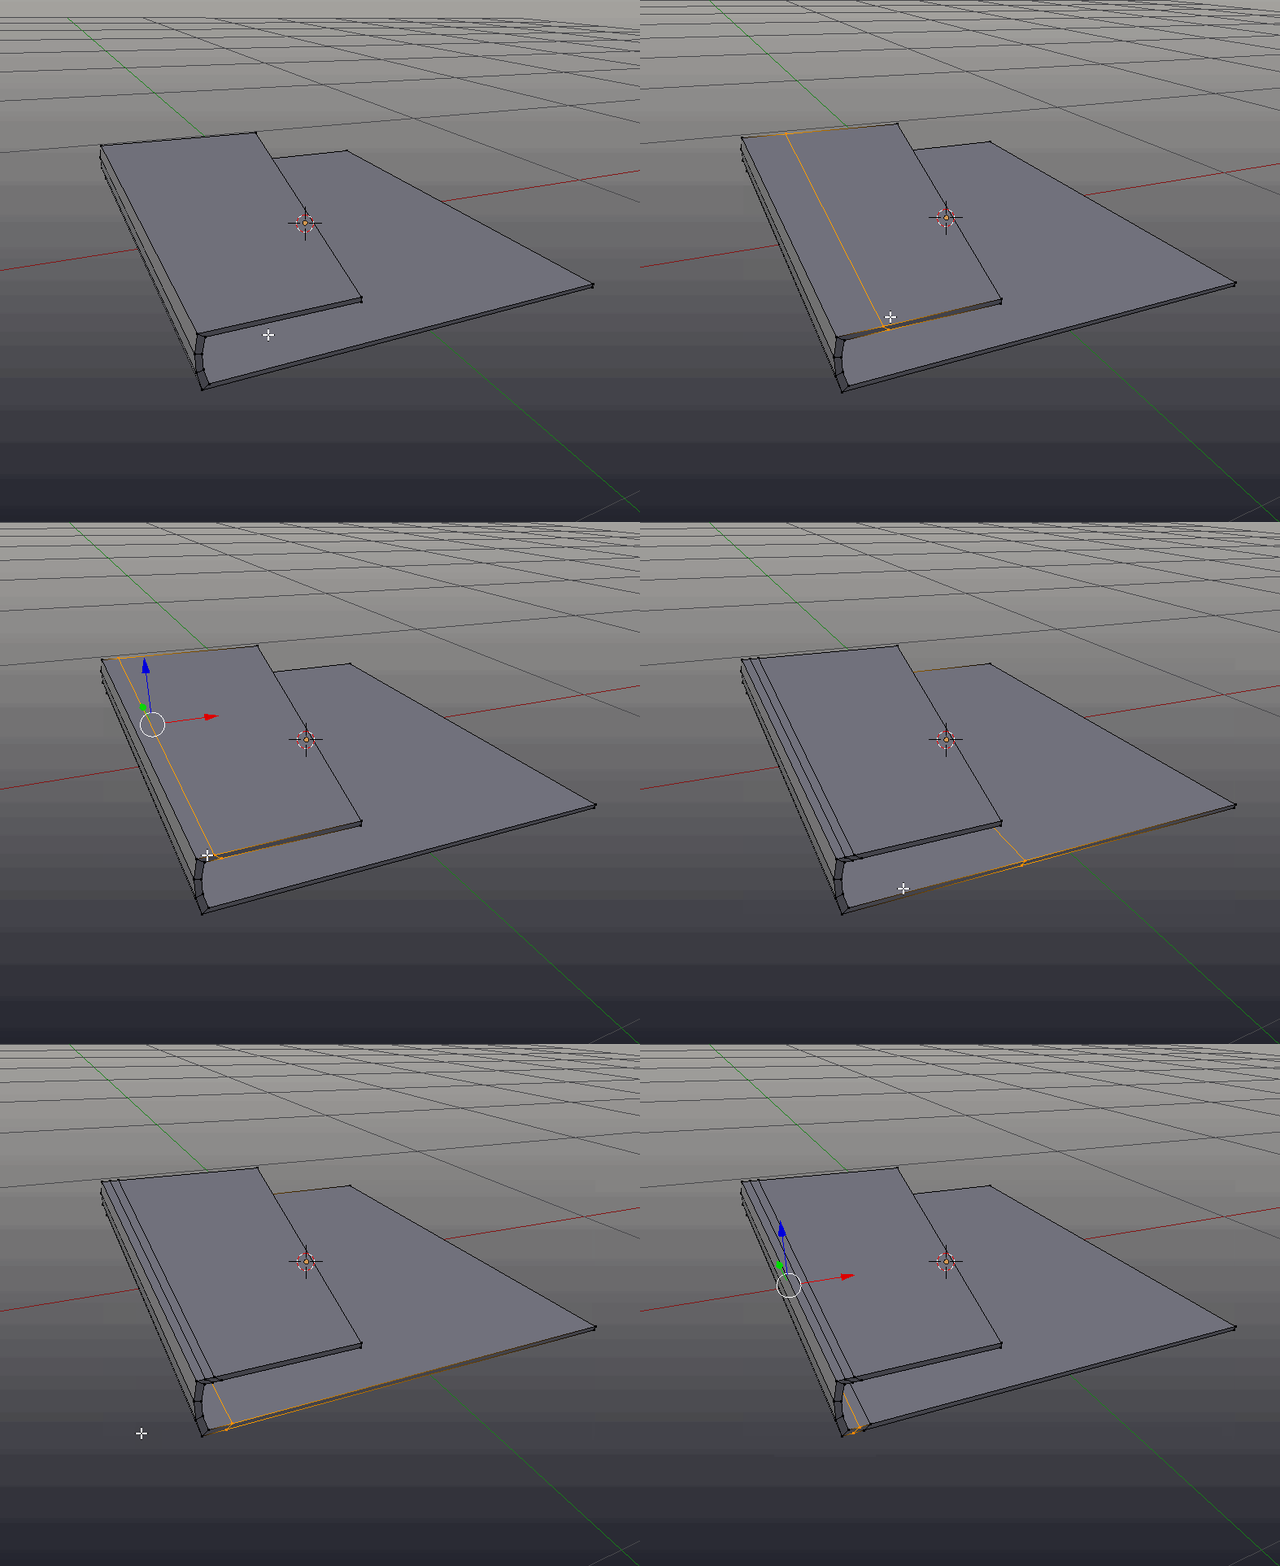
Using the same loopcut tool, add the joint. Create a loopcut in the cover (Ctrl)-(R), this time with only one loop. Hit LMB to confirm the cut, and then slide it along, until its near the spine. Add another loop cut in the middle. Do the same for the back of the book.
Scale the two central loops together (select with Alt-RMB,Shift-Alt-RMB) along the Z axis (S)(Z), until there is a visible joint:
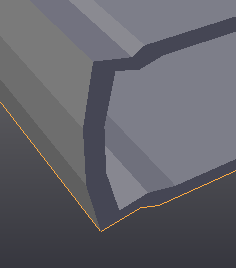
The edge of the spine appears to sharp. Select the edge on both sides of the spine, and bevel them using (Ctrl)-(B), use the scroll wheel to increase the amount of bevel.
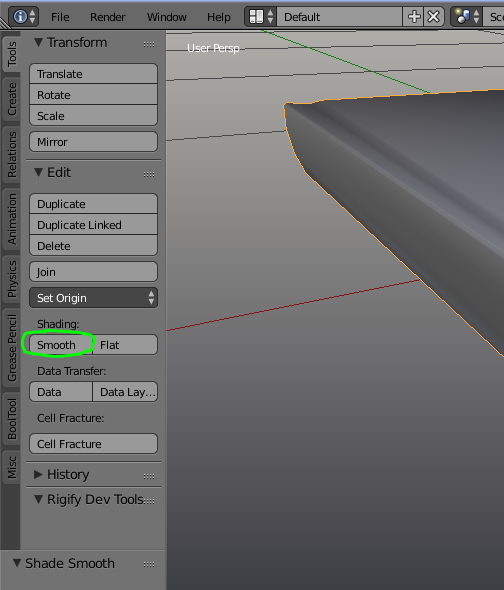
The cover is now ready for the finishing touches. The hard edges of the faces are visible. To rectify this, set the shading to smooth in the toolbar on the left side (accessible via the (T) key).
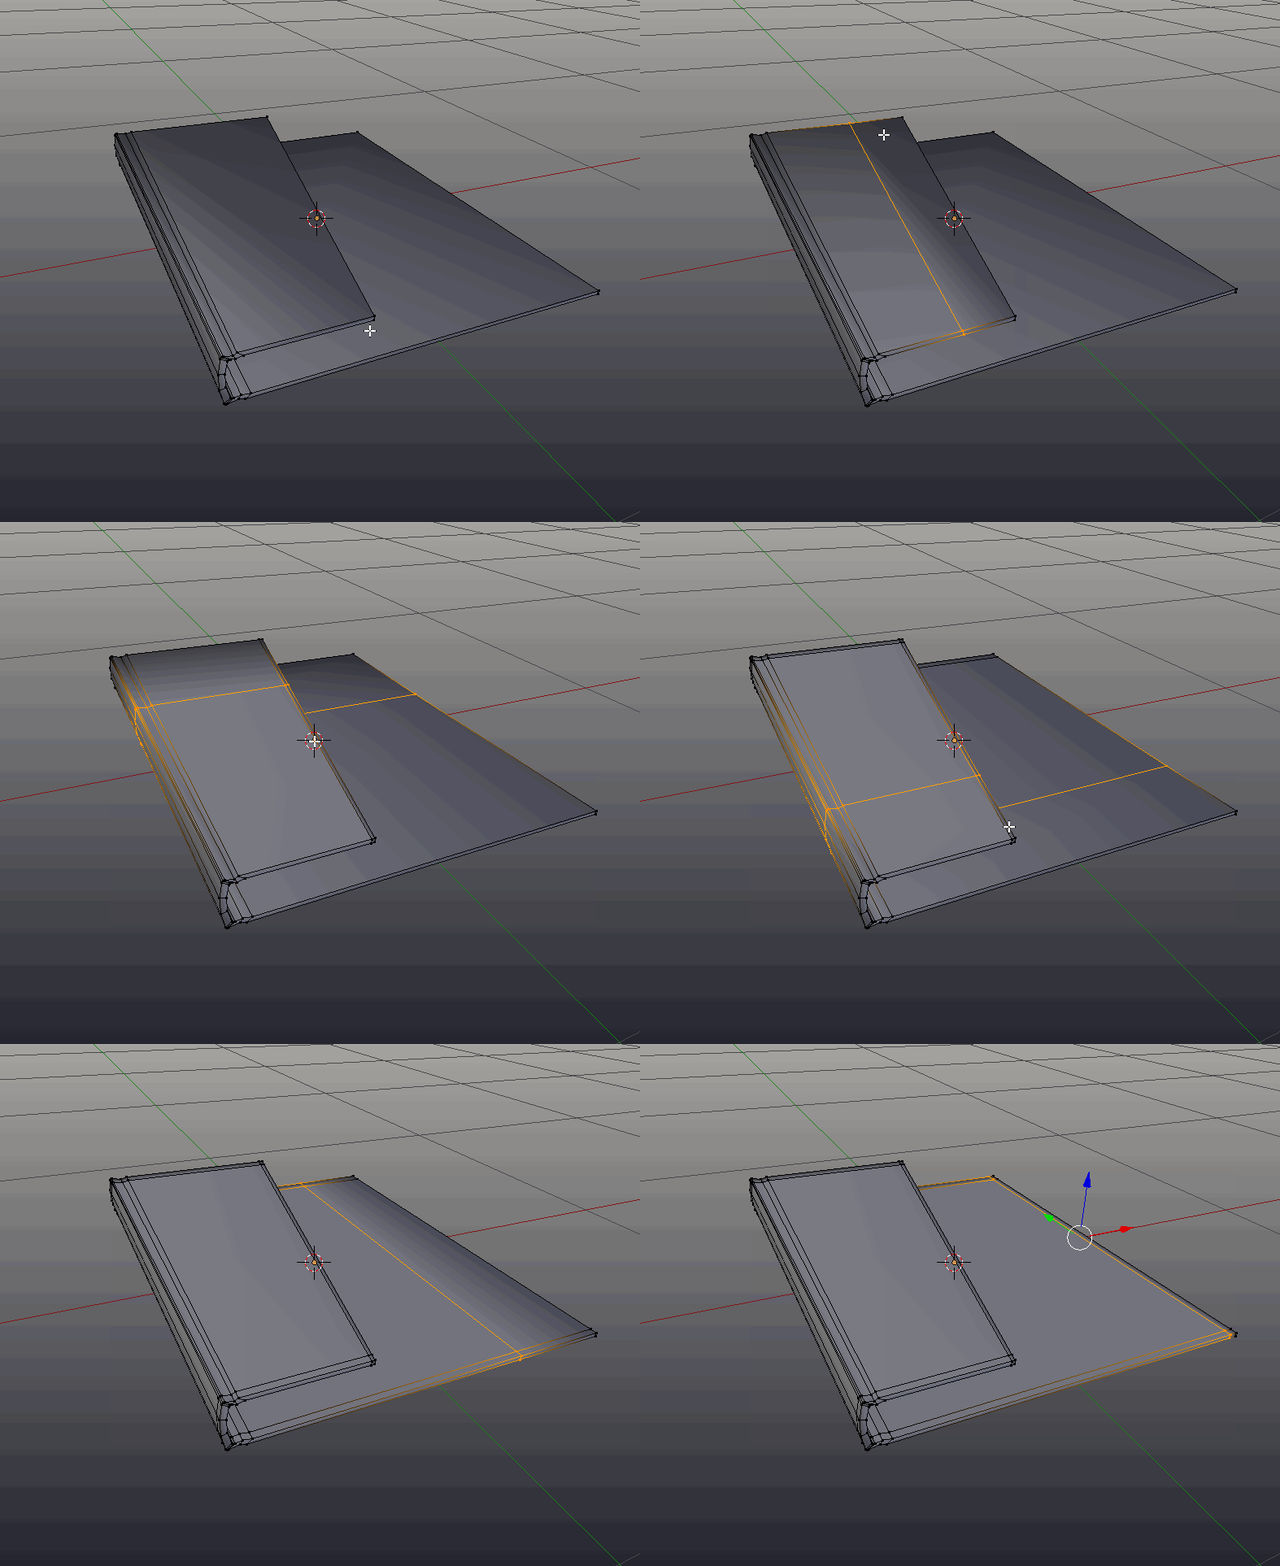
Next add some loopcuts around the edges, in order to ensure the smooth shading does not cause artifacts on the flat surfaces of the notebook.
An important part of making any 3D object render realistically is getting the edges correct. Most paper products have very small rounding and the edges. Even though it is small, such edges can catch reflections and make a notable difference to the appearance and realism of the render. To get this rounding, a modifier can be used.
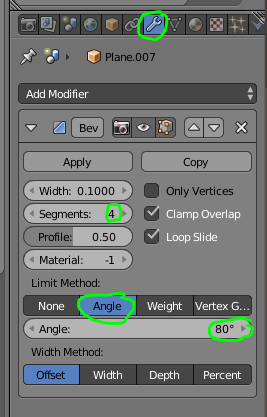
Add a bevel modifier, in the modifiers tab, and set the segments to four, the limited method to angle, and the limit angle to a number slightly smaller than 90 degrees.
The cover is now complete. Next the two decorative panels can be added. First the cardboard portion of the decrative panels will be created.
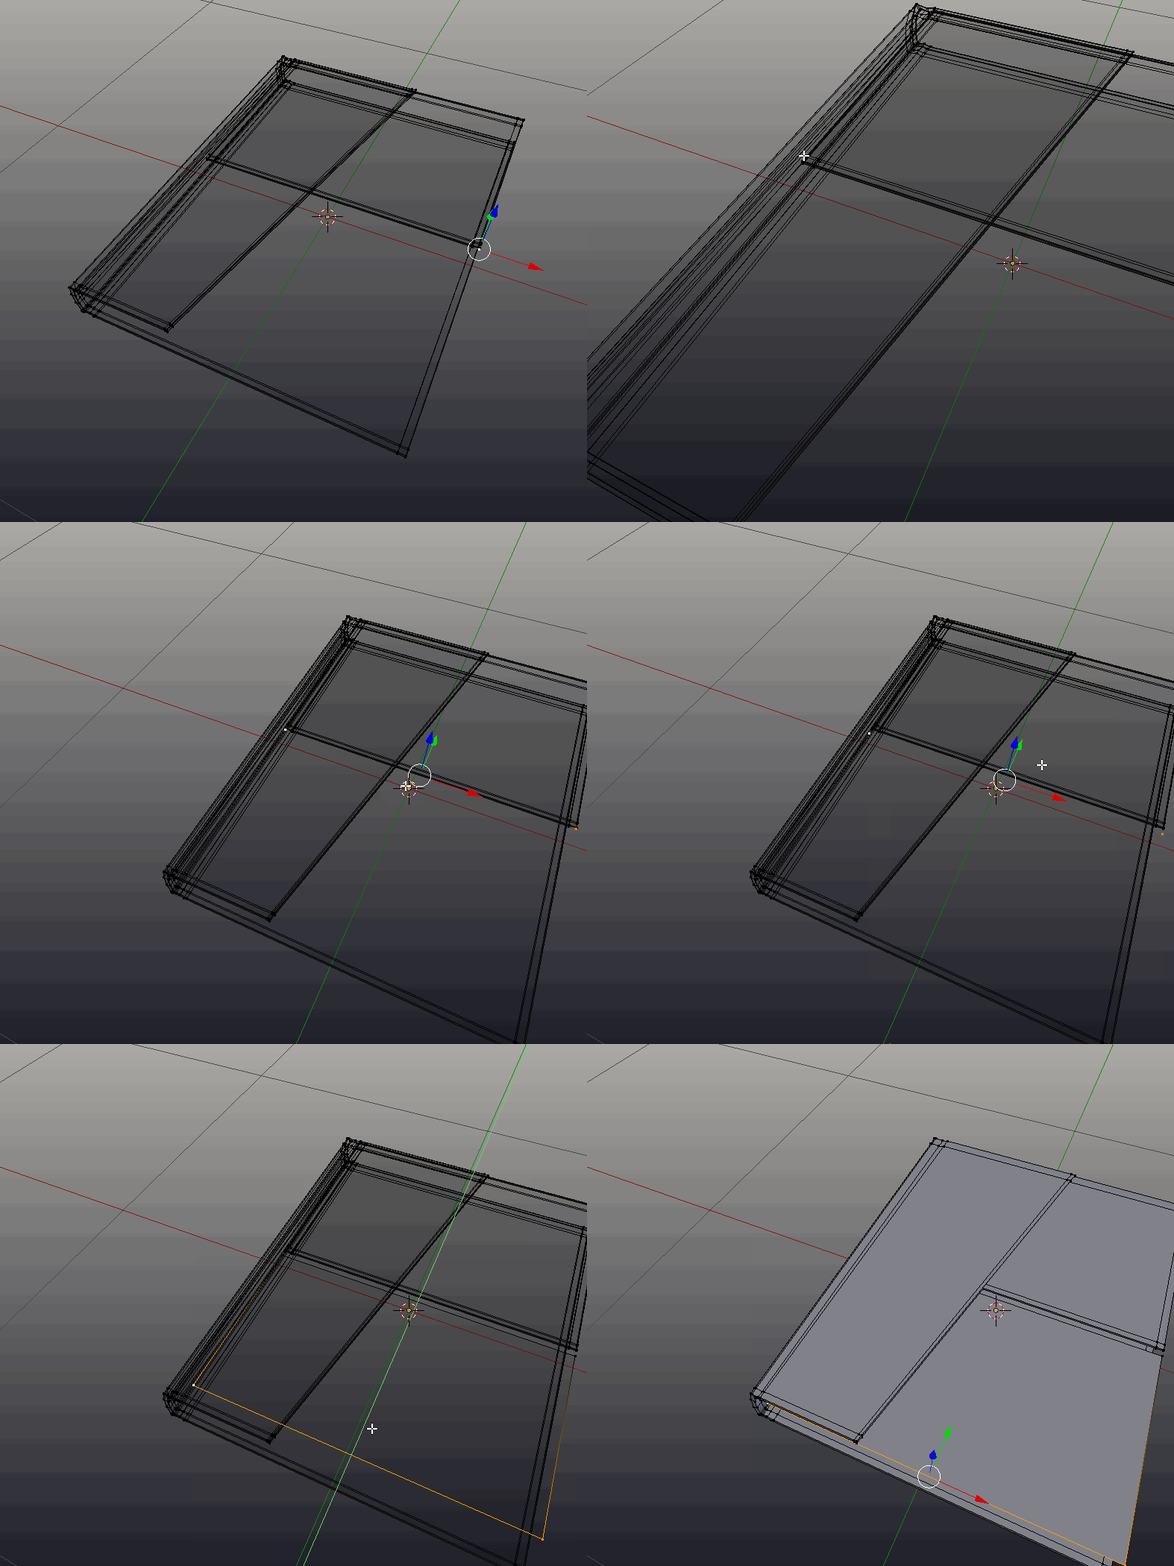
Duplicate the faces on the back cover up along the Z-Axis (Shift)-(D), and position it above the cover, so it is easier to work with.
Entering top view (Numpad 7), move the vertices on the bottom of the newly created plane up, to the point at which the cardboard should end.
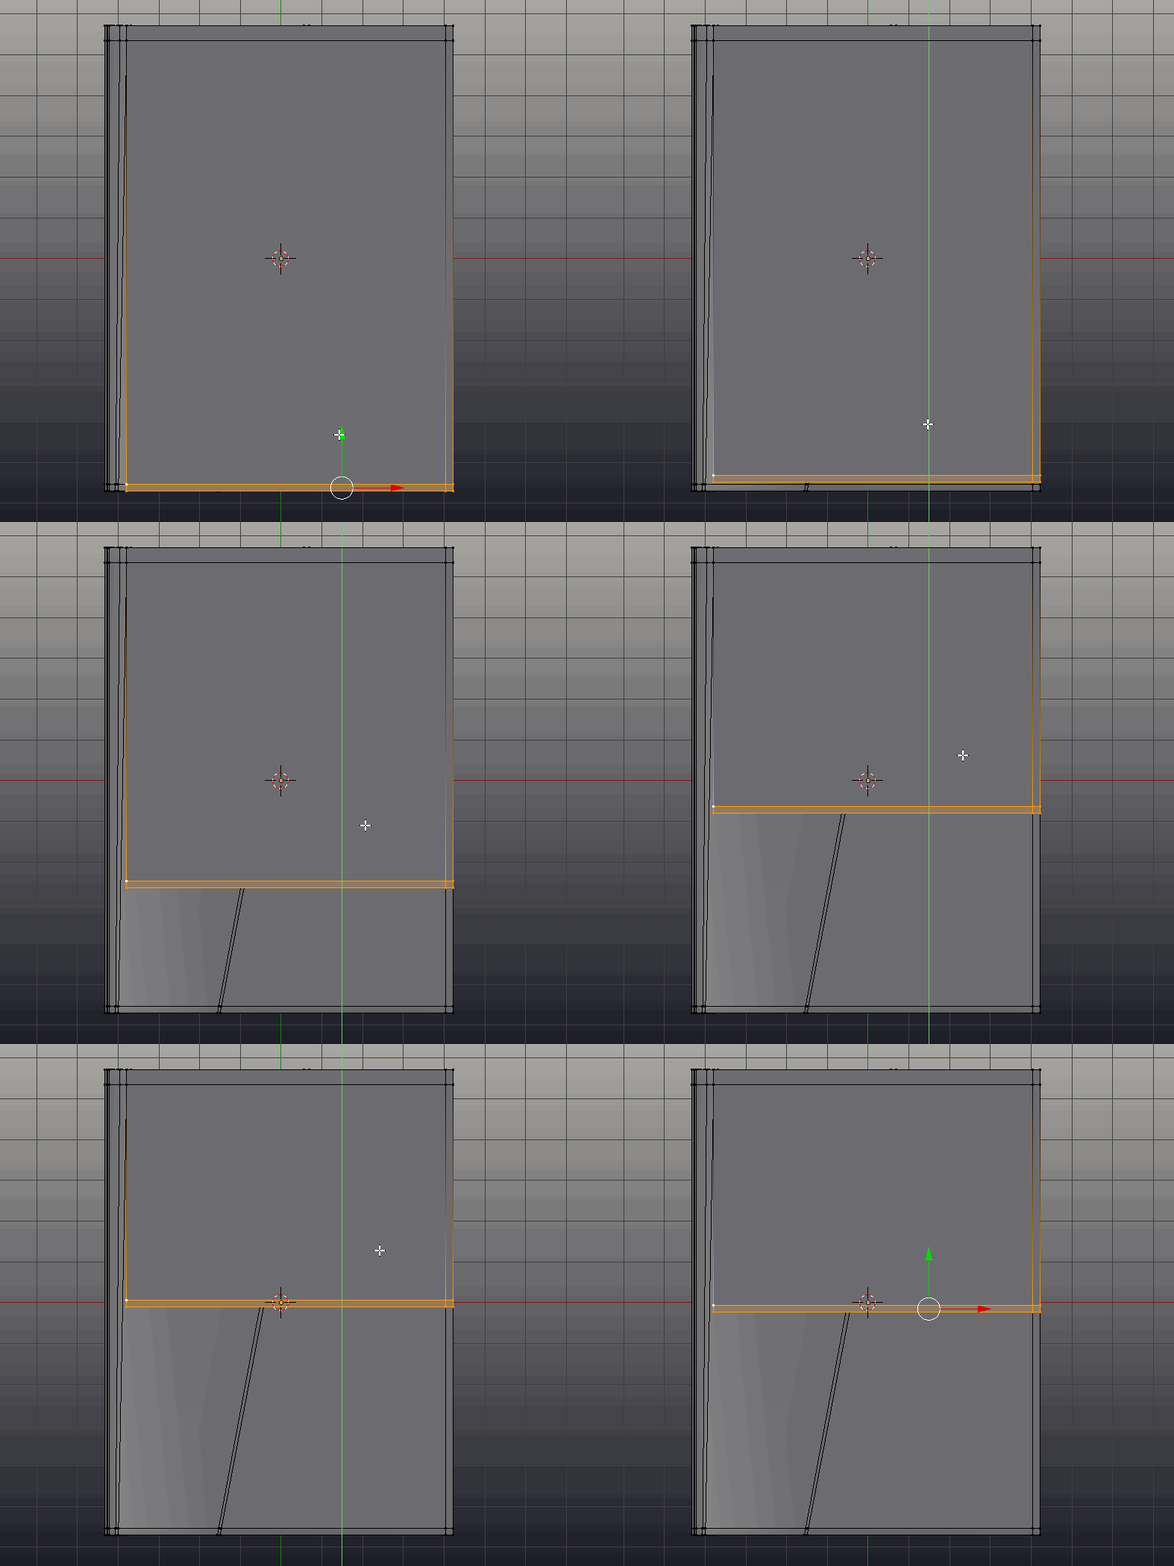
Then add a loop cut (Ctrl)-(R) along the left side, so all the edges are held in place.
Select all the faces on the cardboard portion, by deselecting everything (A) will toggle the selection, it may need to be pressed twice, and then hovering over the portion to select, press (L).
Extrude it down (E)(Z) until it is slightly less thick than the cover. Select the entire portion with (L) again.
Move it down (E)(Z) until it is below the cover, but intersecting slightly:
Finally, the decorative purple portion of the cover can be modeled.
Hit (Z) to enter wire frame mode (Z can be used to toggle back to normal, solid, view mode).
select the two corner vertices of the cardboard inset, and duplicate them (Shift)-(D)(Y), down a bit. Hit (F) to create an edge between them, and then Extrude them along the Y axis down to the bottom of the book. Exit wireframe mode (Z).
Move the two topmost vertices a little distance inside the cardboard inset, so there is no visible gap. Select the purple inset with (L), and then use P>Selection to make the purple inset into a separate object, which will be easier to work with.
Exit edit mode (Tab), select the purple inset object, and enter edit mode again (Tab).
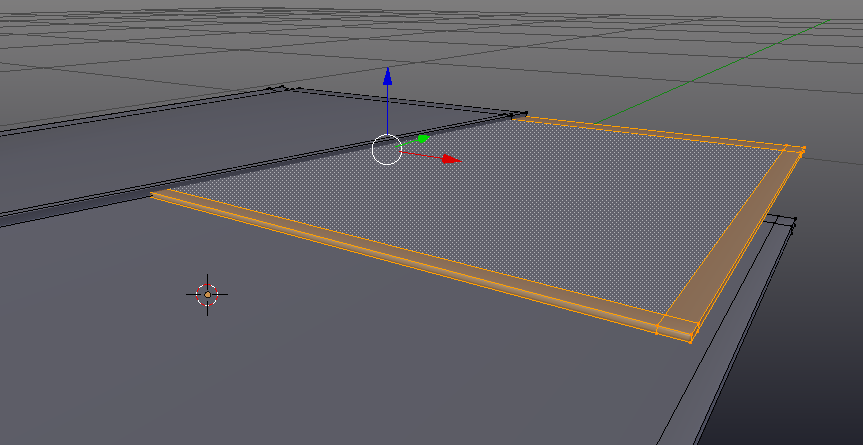
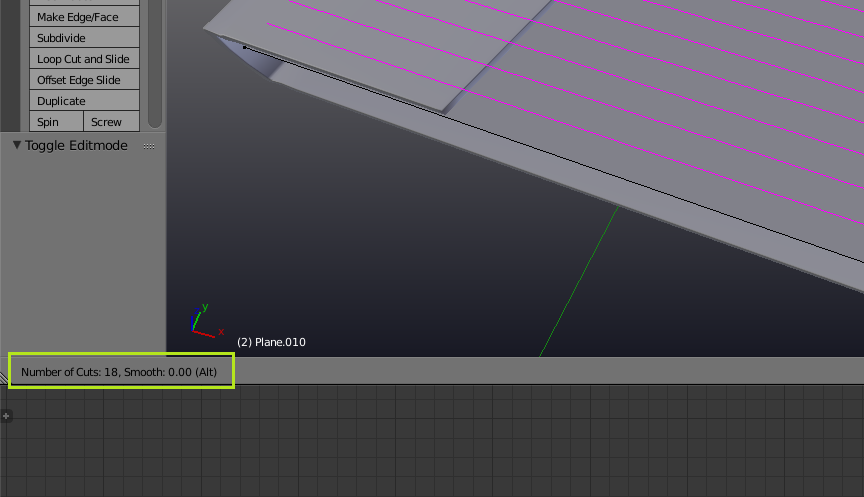
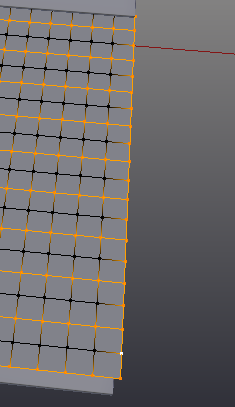
at 18 loopcuts (adjust the count using the scroll wheel) perpendicular to the book. The exact count can be viewed while using the tool in the bottom left hand corner of the viewport:
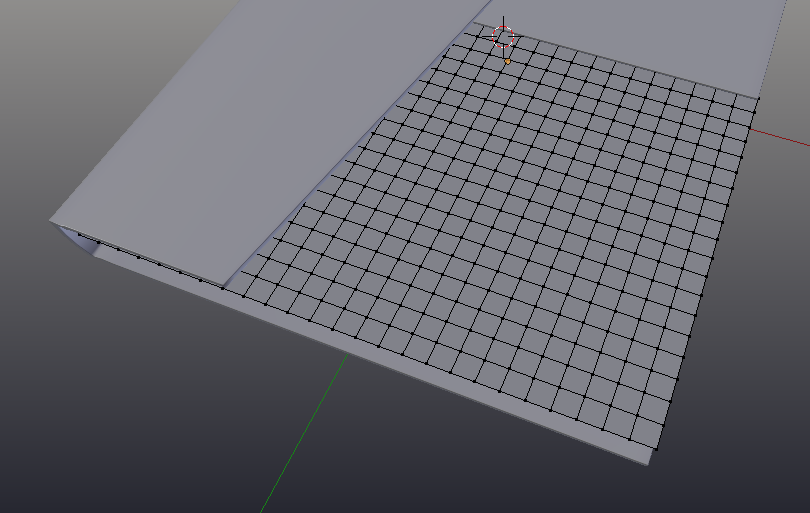
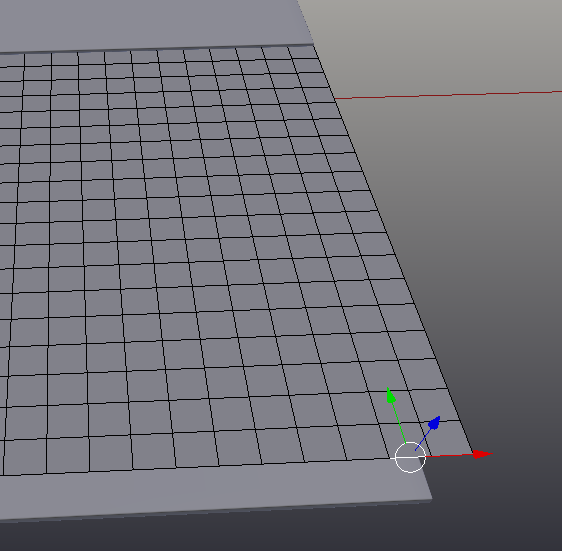
Add anther loopcut parallel to the spine of the book. Add enough division such that the spaces between the loop cuts and the perpendicular edges become squares:
the following steps to create this pattern are courtesy of gandalf3.
Next, create the pattern. Start by switching into edge select mode (Ctrl)-(Tab)>Edge
select an edge along the bottom of the pattern, avoiding ones on corners:
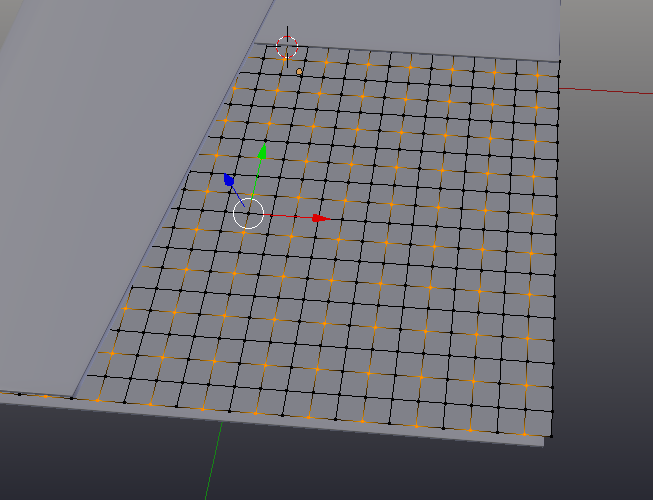
Hit (Space bar), and search for Multi Select Loops. Hit (F6), and check ring. Re-enter the spacebar menu, and search for and select Checker Deselect. Use multi-select loops again, this time, un-check ring. Switch into vertex select mode (Ctrl)-(Tab)>Vertex. Select a ring going in the opposite direction (Shift)(Alt)(RMB), and run checker deselect again.
Select the perpendicular ring originally selected again (Shift)(Alt)(RMB), and deselect it (Shift)(Alt)(RMB). The selection should look like this:
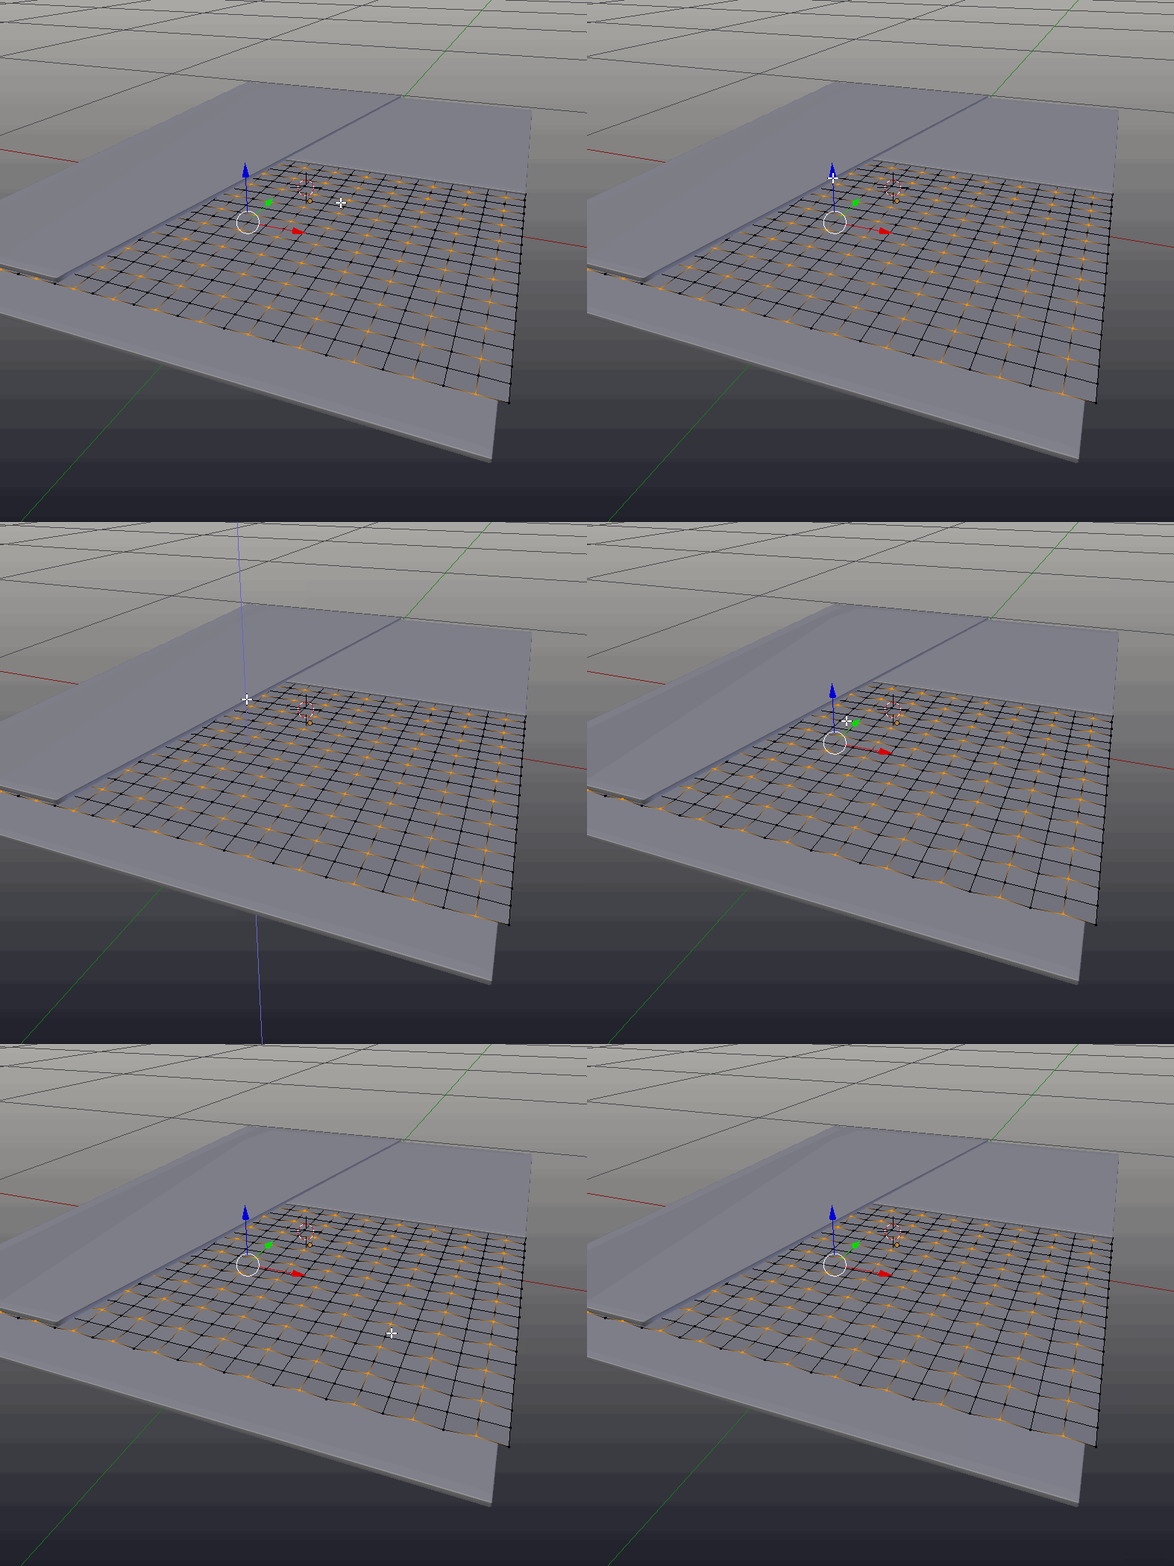
Next, move the selected vertices up, a small bit to make little “mounds:”
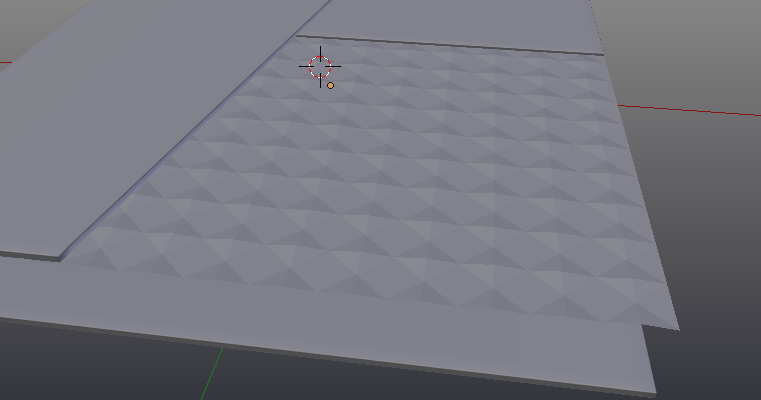
Select everything, and hit (CTRL)-(T). Out of edit mode the mesh should look like this:
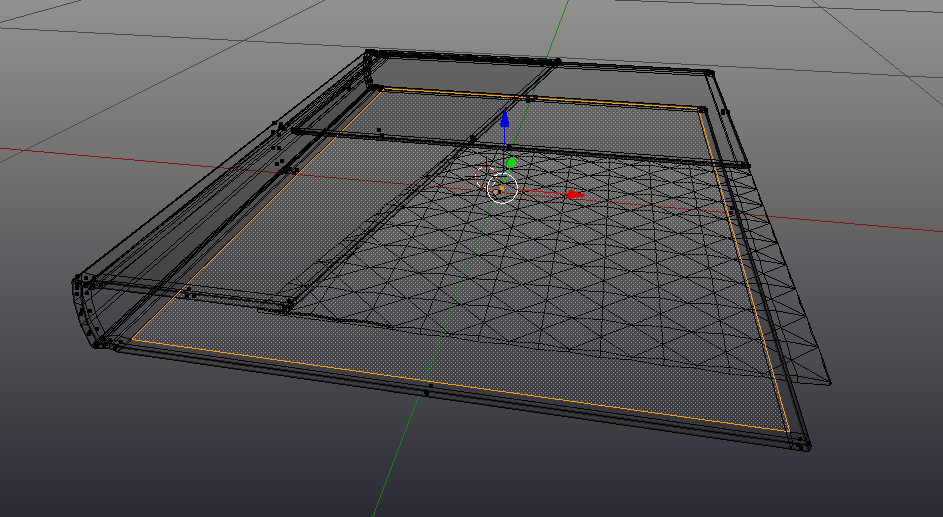
Select the edges using (Alt)-(RMB) and then (Shift)-(Alt)-(RMB), and extrude them down, and scale to zero (S)(Z)(0). On vertices on the edge where there are mounds, or the corner of mounds, move those vertices out slightly.
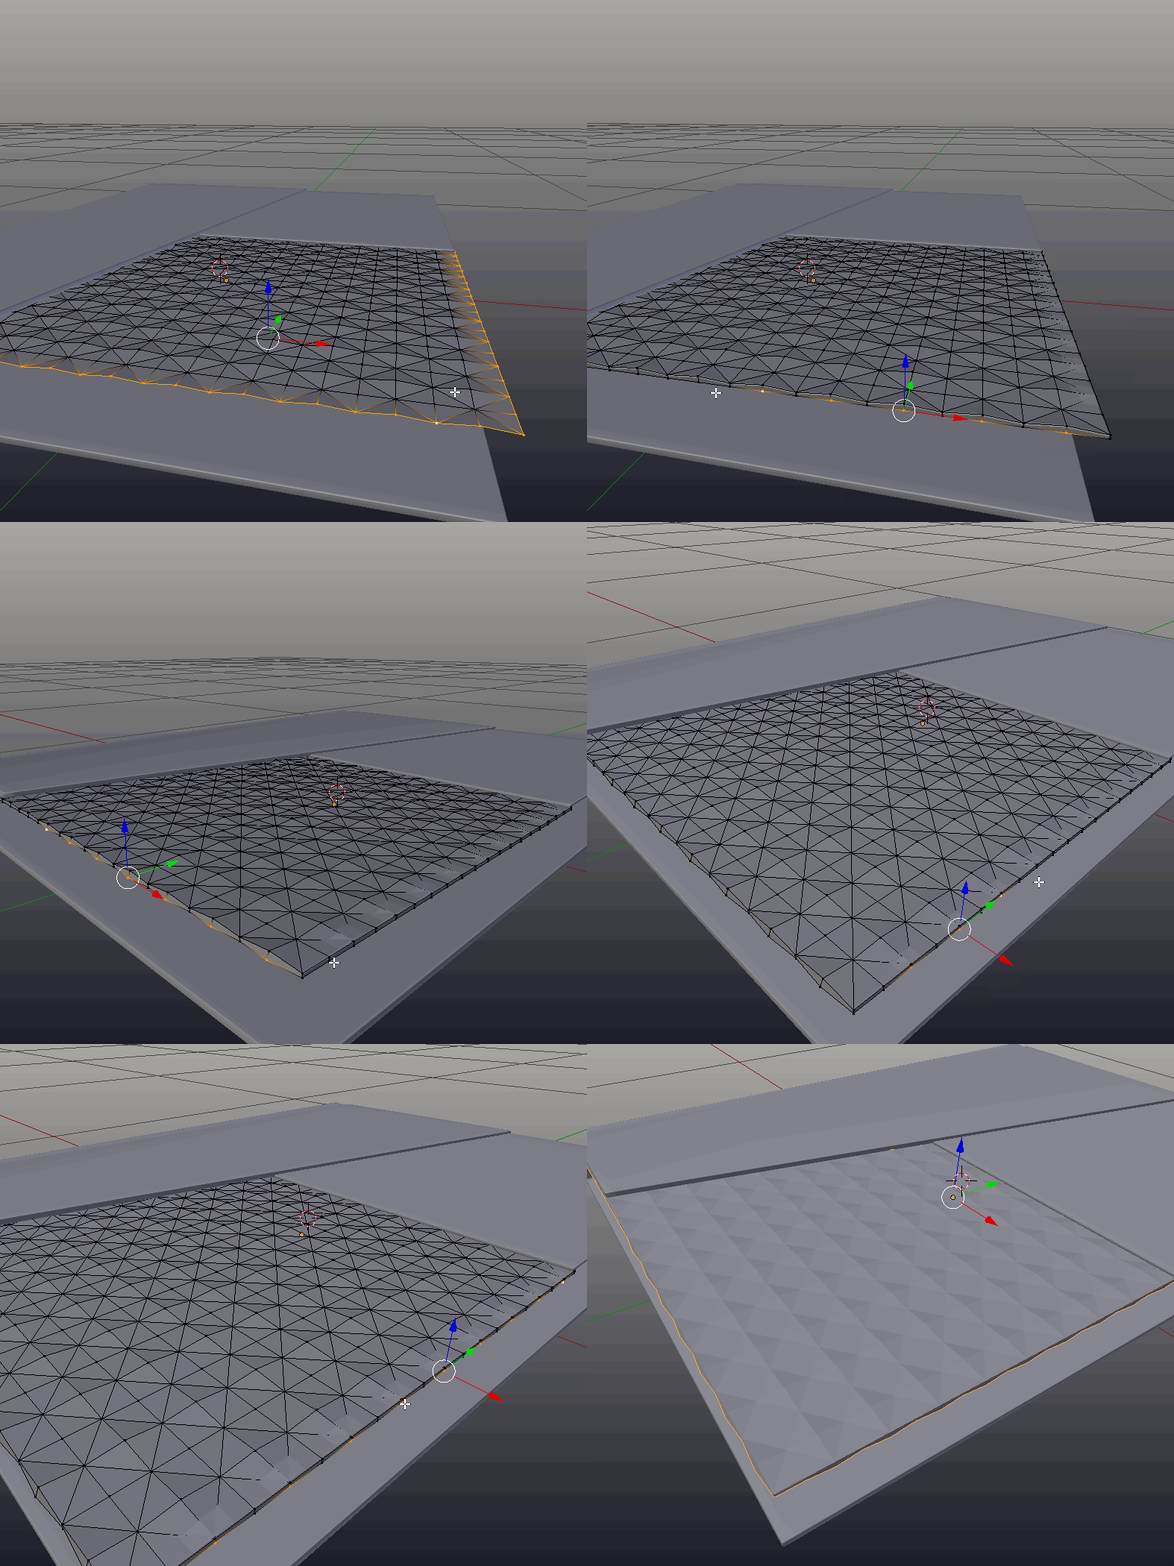
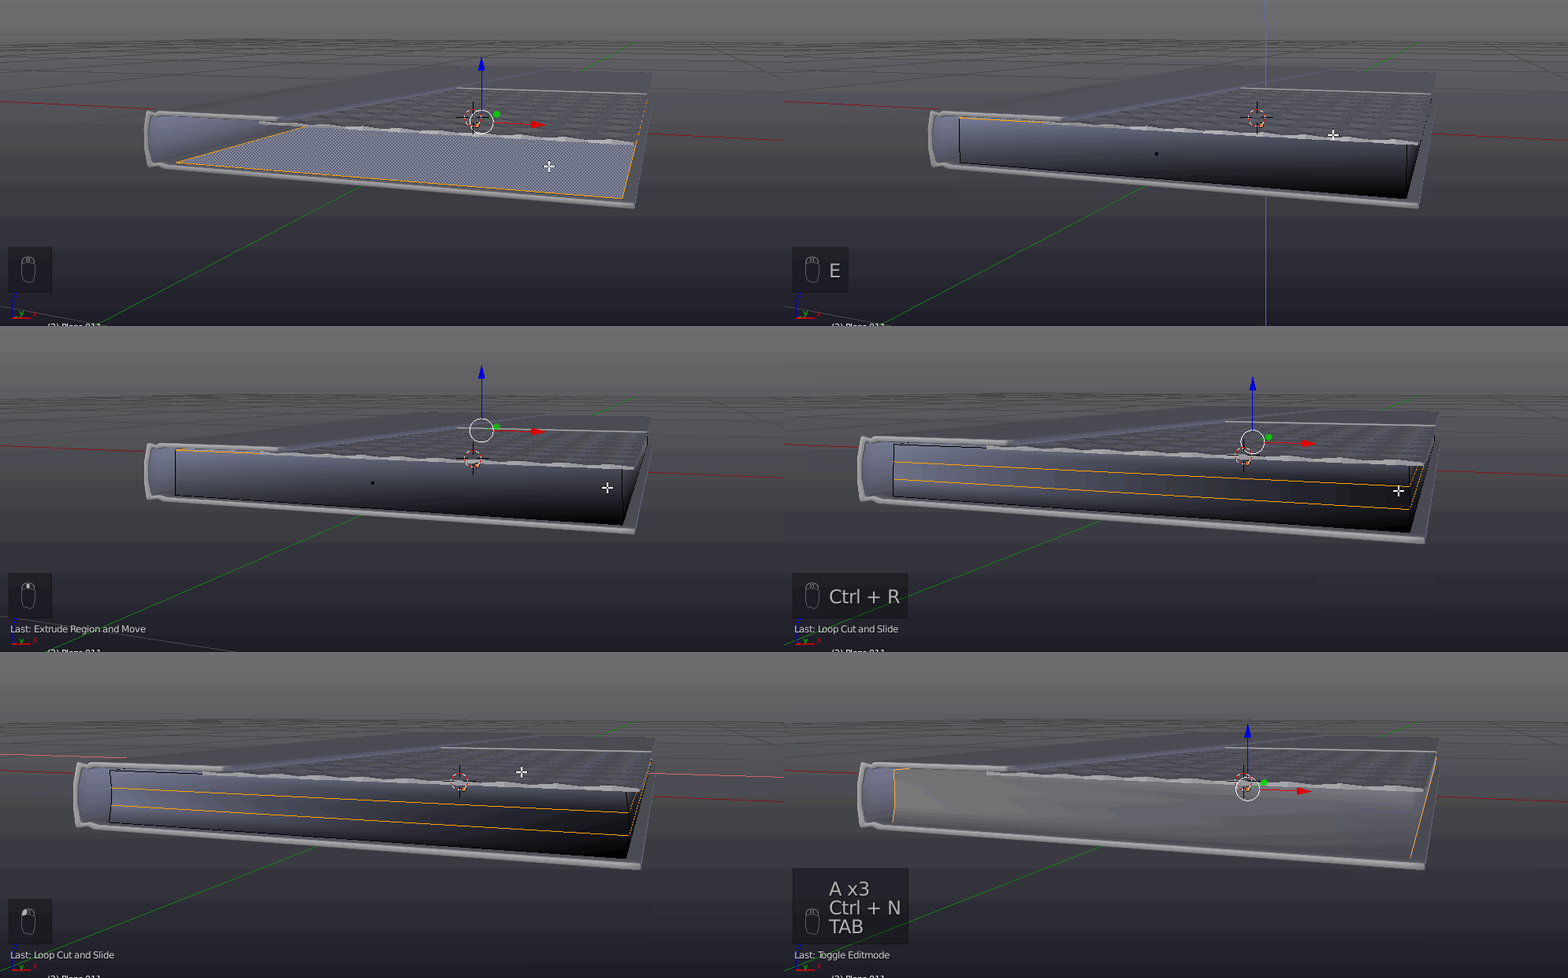
The modeling portion is nearly over. Lastly, the pages need to be added. Select the face on the bottom of the cover:
Duplicate it without moving (Shift)-(D)(RMB). Hit (P)>Selection, to make it a separate object. Exit edit mode, and select that object.
Deleted the bevel modifier, by entering the same tab and clicking the (X) icon. Then enter edit mode (TAB), and extrude up (E)(Z) the face until it meats the top cover. Add two loop cuts, and shift them along the (X) axis until the pages have a little bend. If the mesh appears dark an weird, use Ctrl-N the fix that.
Select the non curved faces on the mesh, and select them, and set the shading to flat (W)>Shade Flat
The book has now been modeled.
Part Two: Rendering
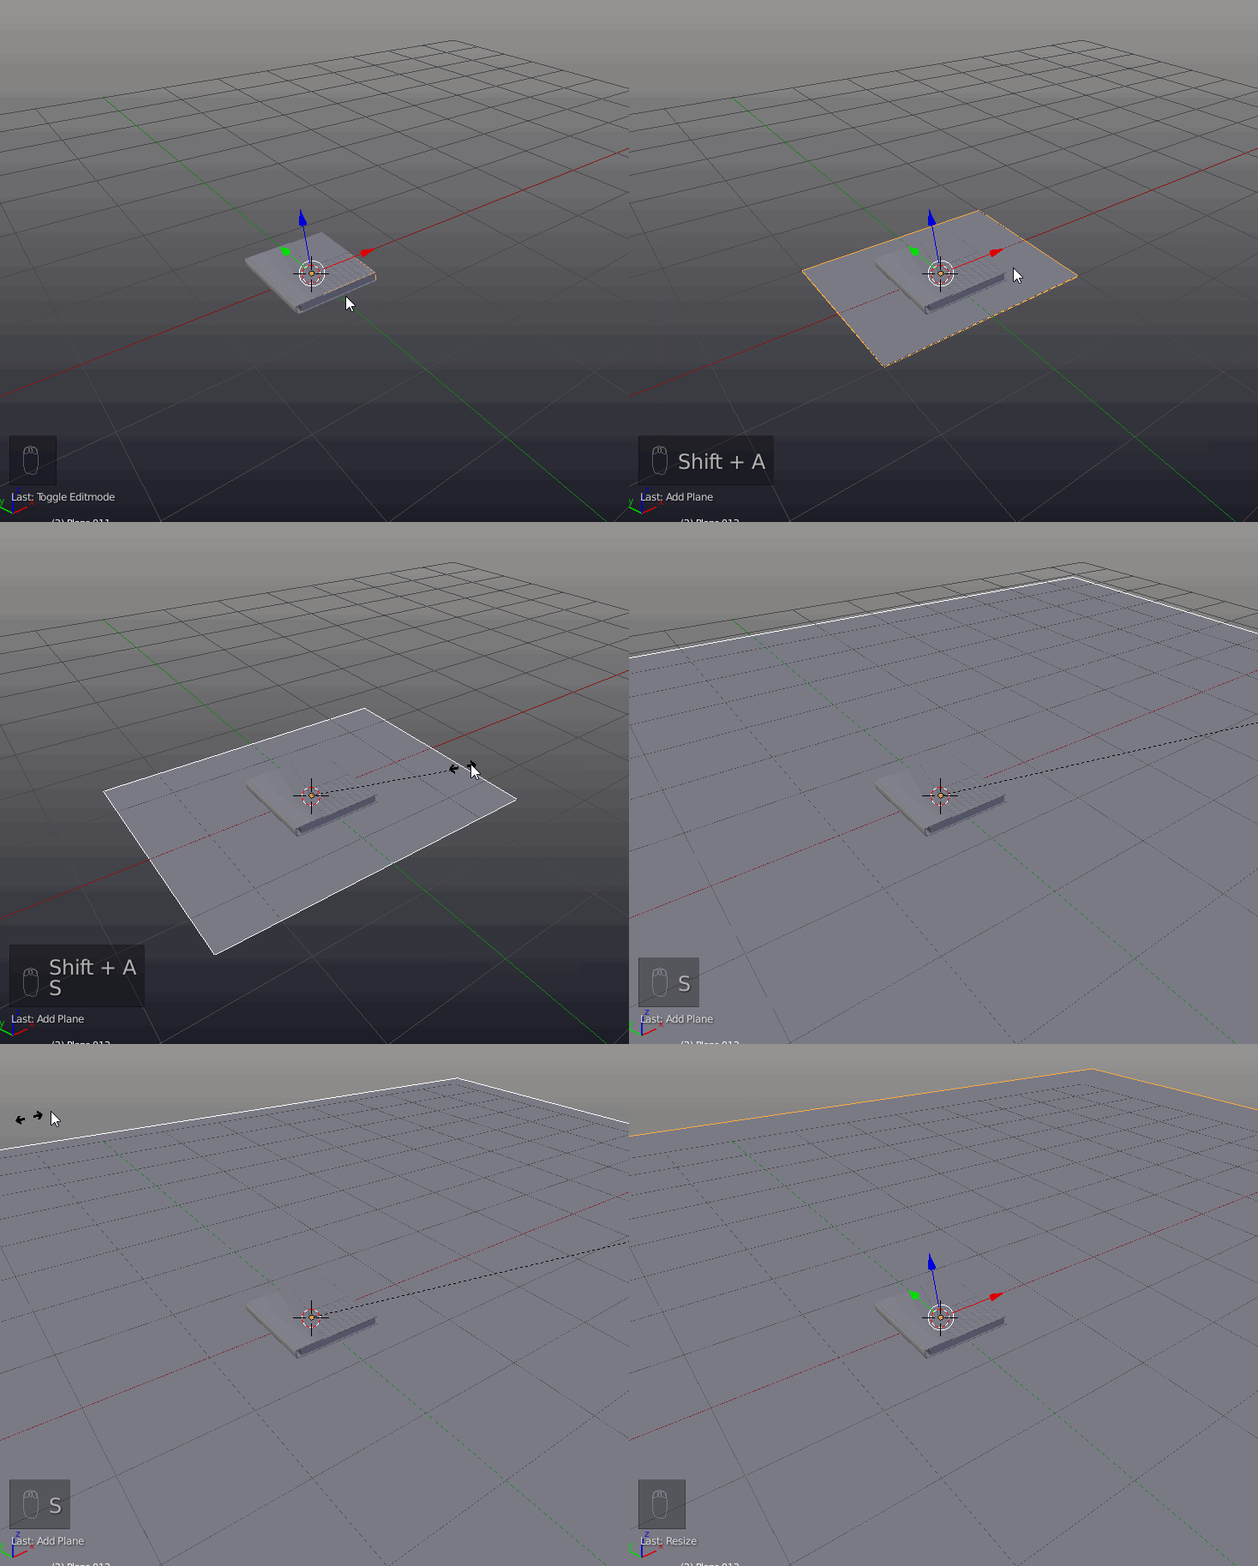
Recenter the 3D cursor with (Shift)-(C). Add a plane using (Shift)-(A)>Mesh>Plane.
Scale it up using (S) until it is several times larger than the book.
Be sure at this point that your render engine is set to the cycles render engine:
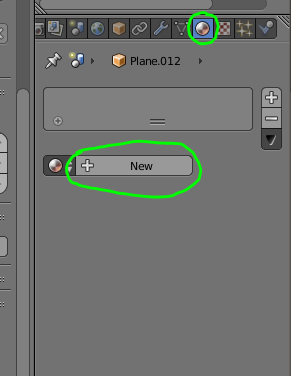
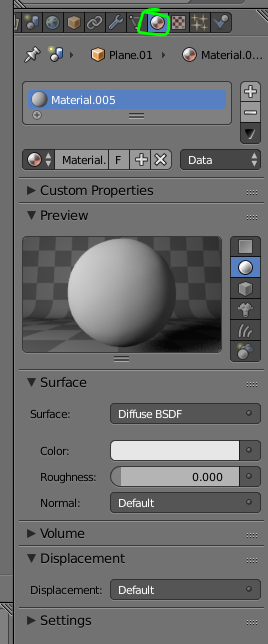
Add a material to the newly created plane
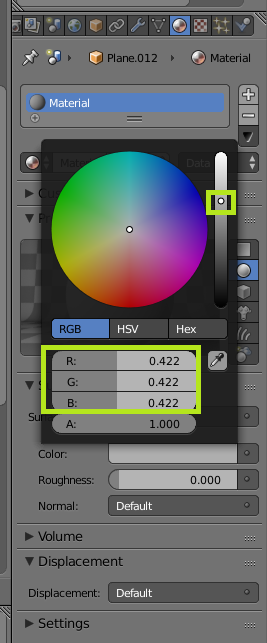
Make the color about a 75% grey, or about .5 RGB:
Before creating materials for the notebook itself, setup the lights and cameras, so that the material can be more accurately previewed. If there is a camera in your scene, delete it.
Add a new camera with (Shift)-(A)>Camera. Clear any rotation, position, and scale transforms, using (Alt)-(R), (Alt)-(G) and (Alt)-(S).
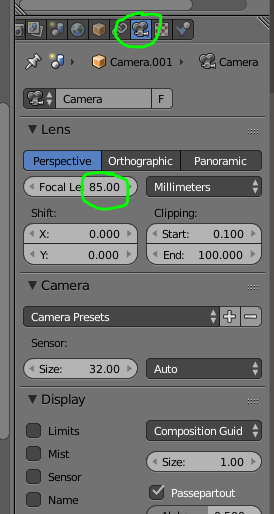
Next, go into the camera properties, and set the focal length to 85mm:
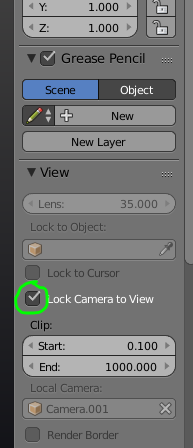
It (Ctrl)-(0) to enter the camera view. Open the properties panel (N), and check lock camera to view:
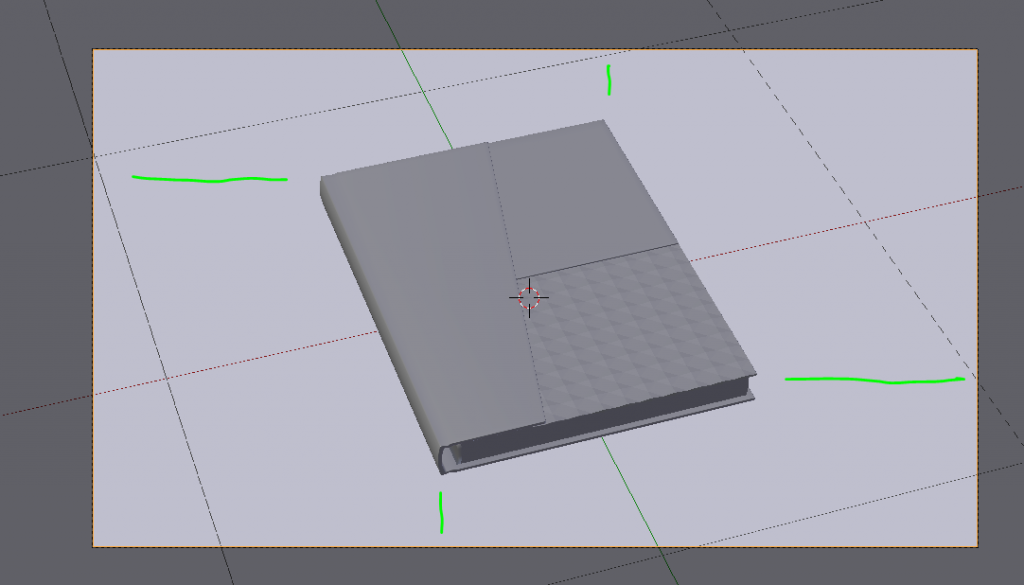
Position the view port to frame the book. Use (Shift)-(MMB) to pan. (G)(Z)(Z) will track the camera forward and backwards. Once the camera is positioned, un-check Lock Camera to View.
Note: When position the camera, try to get the margins as equal as possible.
Next, add a sun lamp (Shift)-(A)>Lamp>Sun
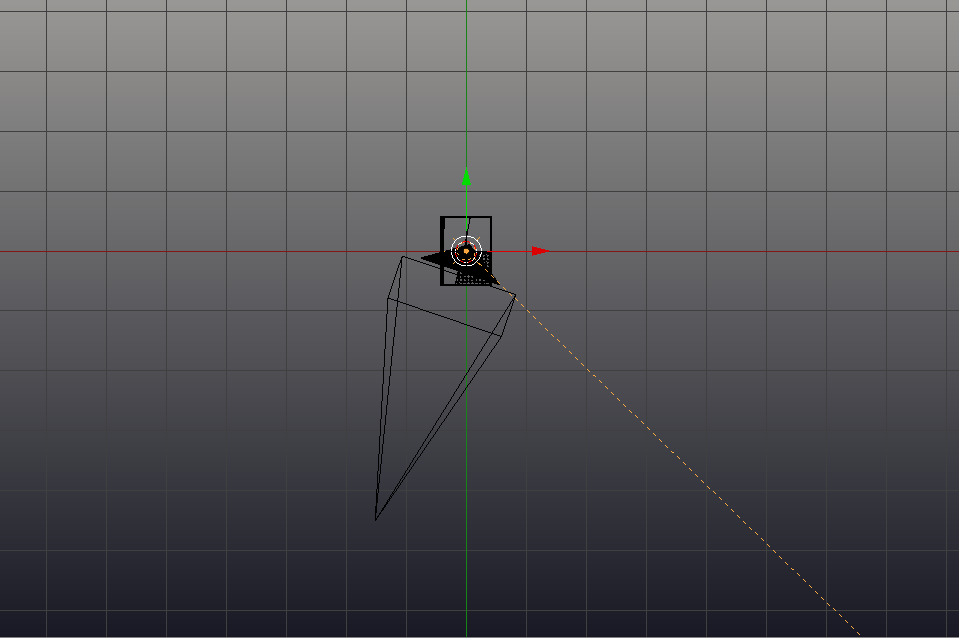
Rotate it by 45, on the y axis (R)(Y)(45). Enter top view (Numpad)(7) Spin it (R) until it is pointing into the bottom right hand corner:
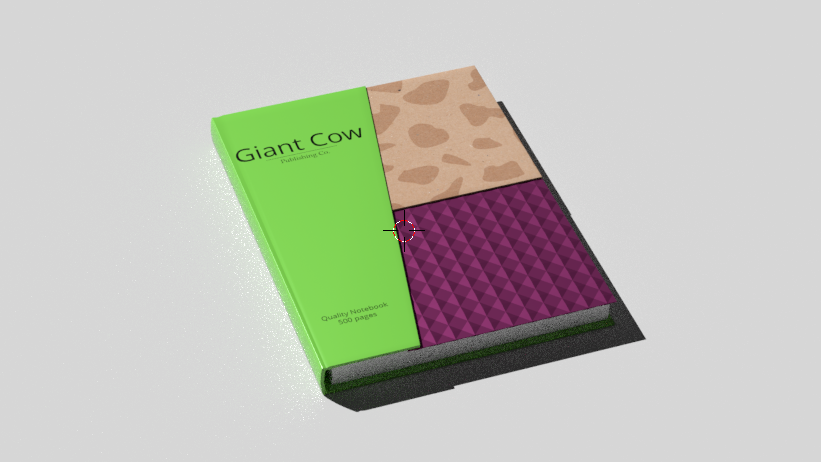
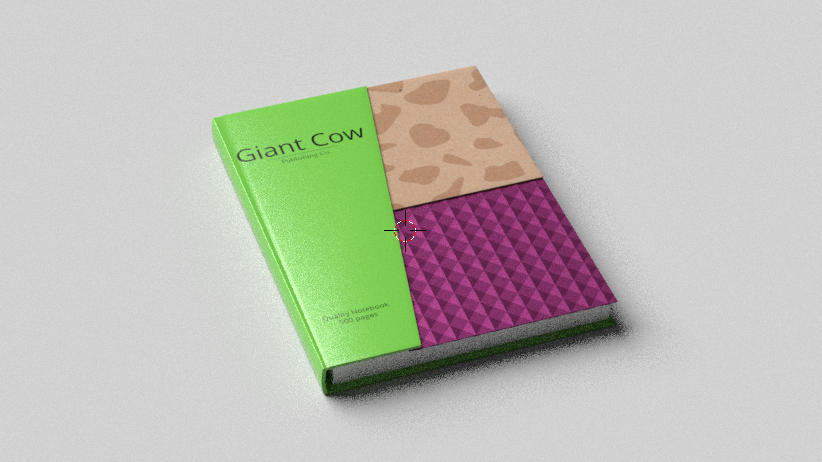
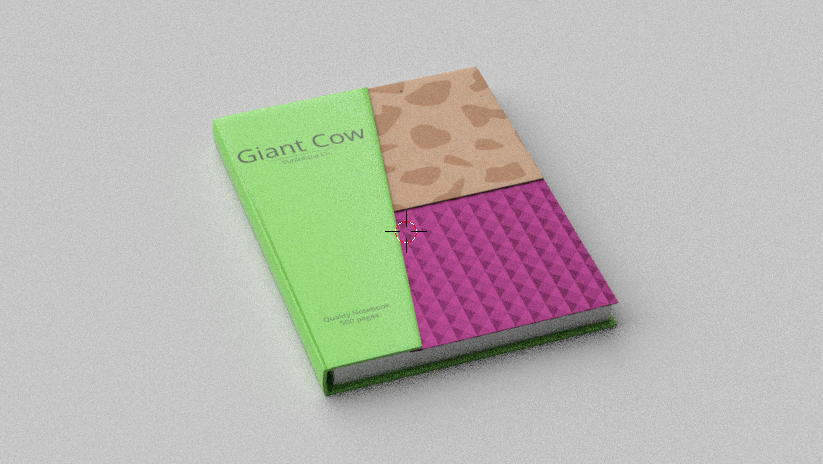
Move the lamp up, out of the way. its position does not matter as long as it is above all the objects that need to be lit. The sun lamp works well for this purpose since it creates completely even lighting across the surface of the notebook. Initially, however, it creates shadows that are two sharp for product renders. This can be rectified by changing the size of the Sun lam in the lamp properties. With the lamp selected, enter the lamp properties. Set the size to around 0.45. Higher values will give softer shadows, this value can be tuned later if need be.
Here are examples with values of 0, 0.5, 1 and 3.
Set the strength of the sun to 6.
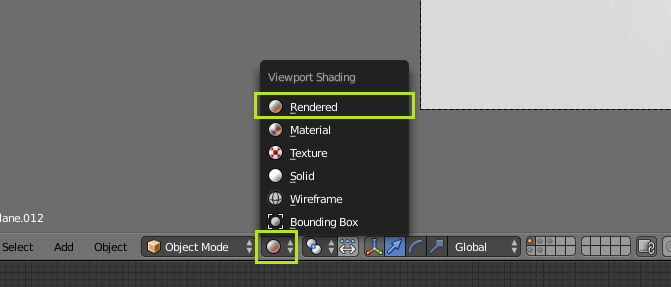
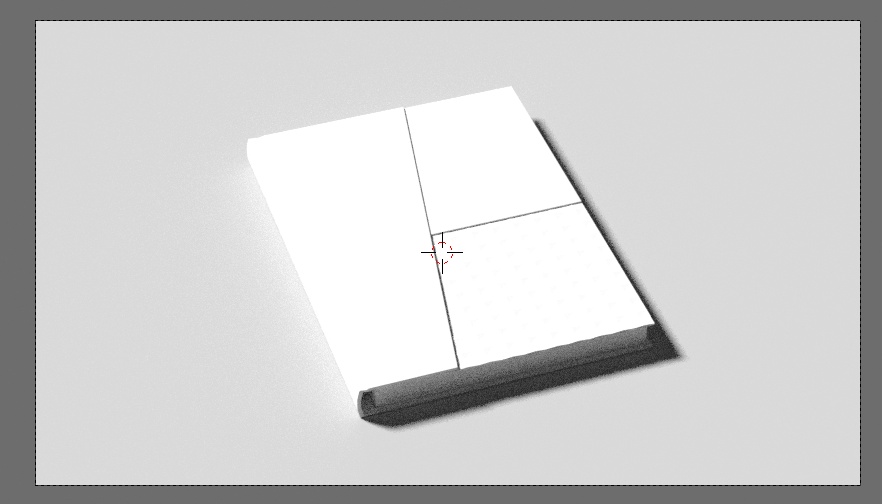
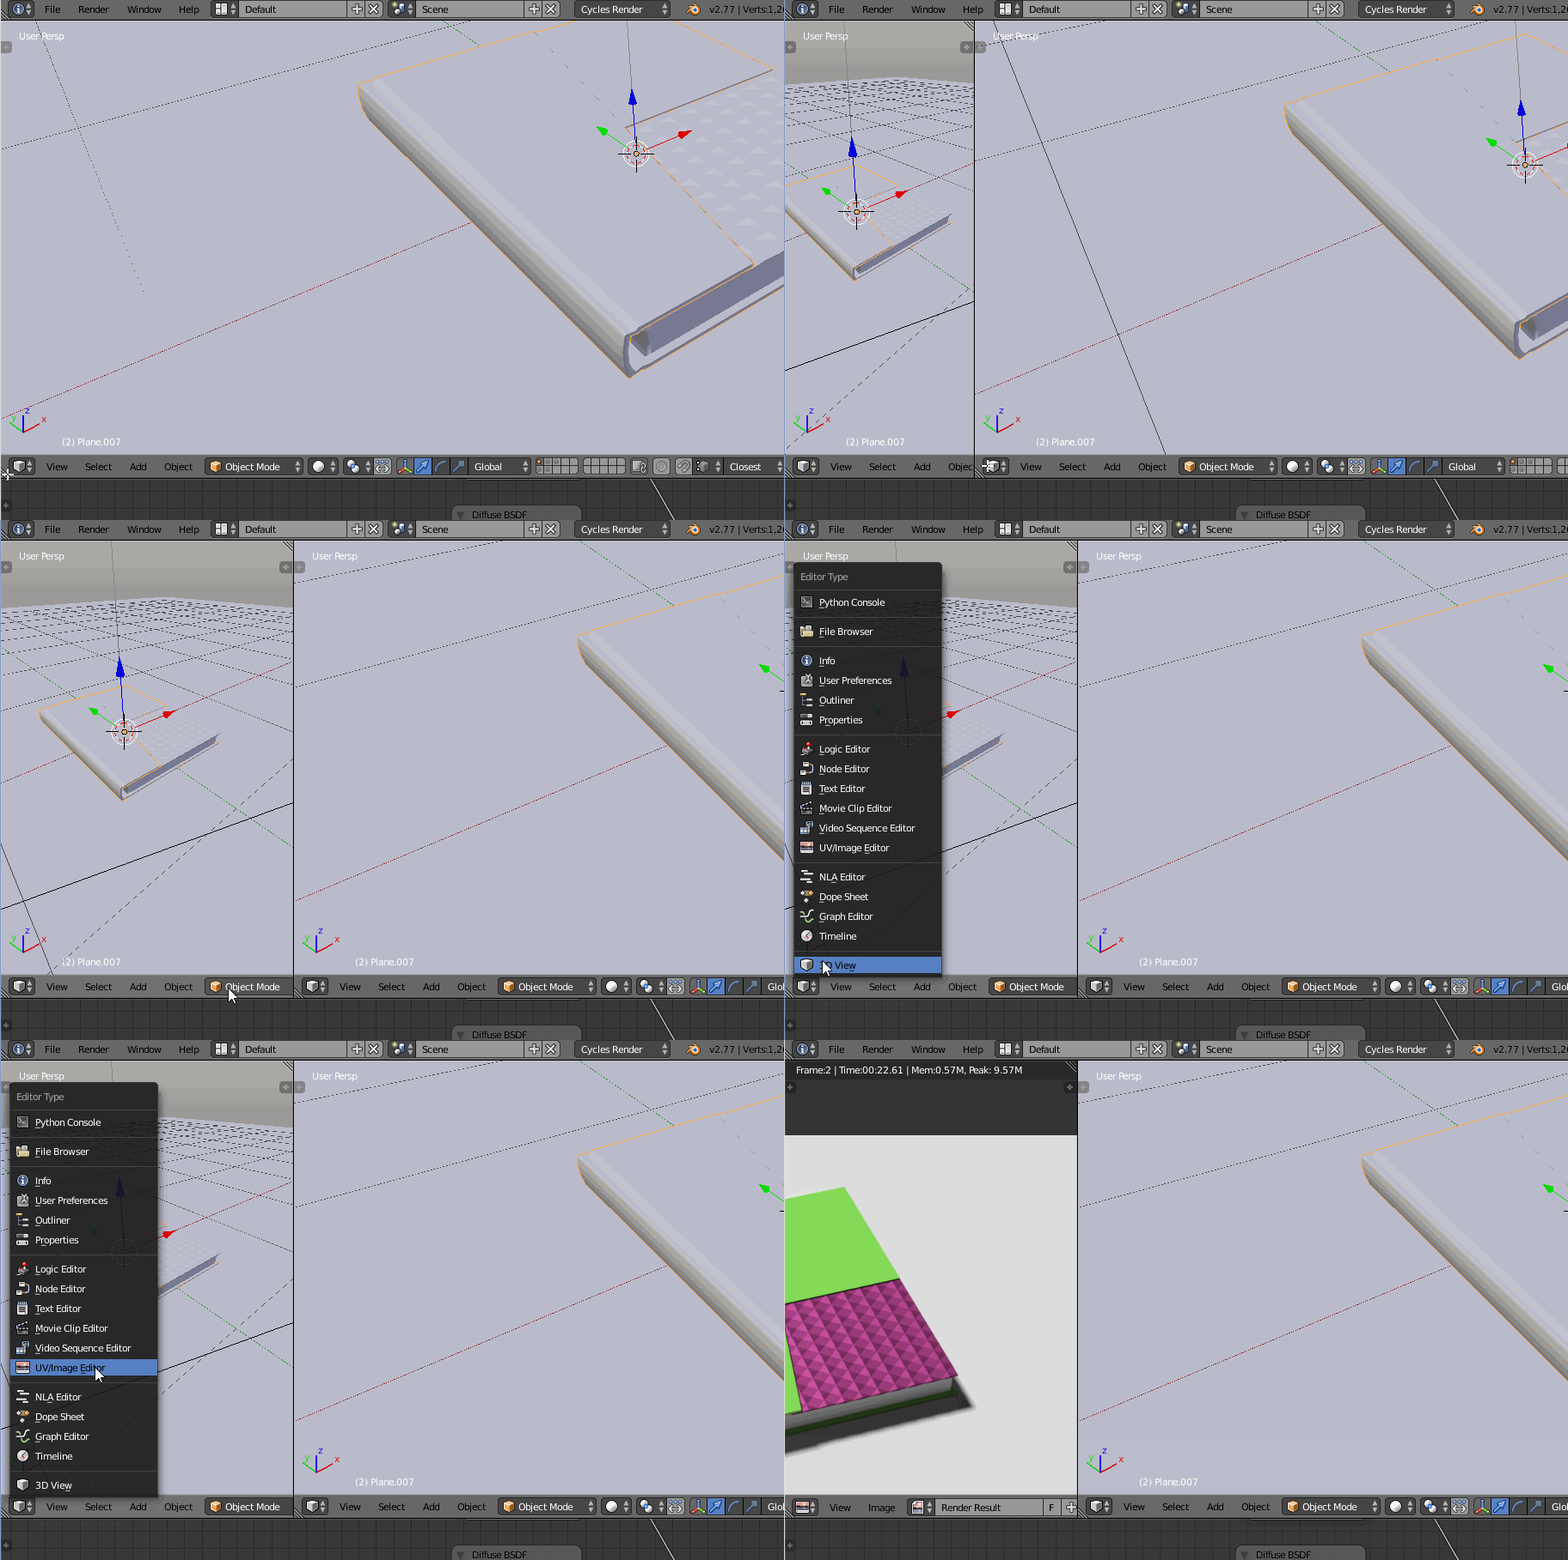
Now verify your setup. Enter camera view (Ctrl)-(0), and set your view port to rendered, using the shortcut (Alt)-(Z), which will toggle in and out of rendered view. The view can also be chagned using the menu at the bottom of the viewport:
The setup should look something like this at this point:
It is now time for the final steps, adding materials to the notebook.
Starting with the pages, select it and add a new material, in the materials tab. Leave the material as default, it works well enough.
The next material will be the purple reflective pattern.
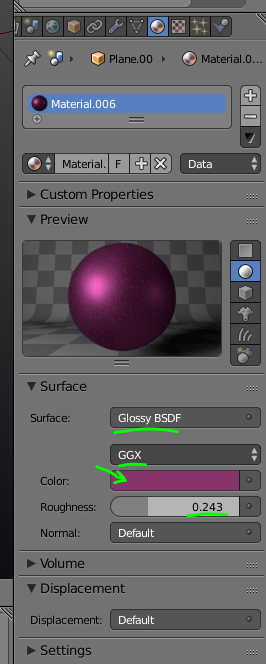
Select the purple inset object, enter the materials tab, and add a new material. Change the Surface from diffused to Glossy, and set the option under that to GGX. Next, set the color to a nice purple, the one in the example is #88346B. Next set the roughness to about .24
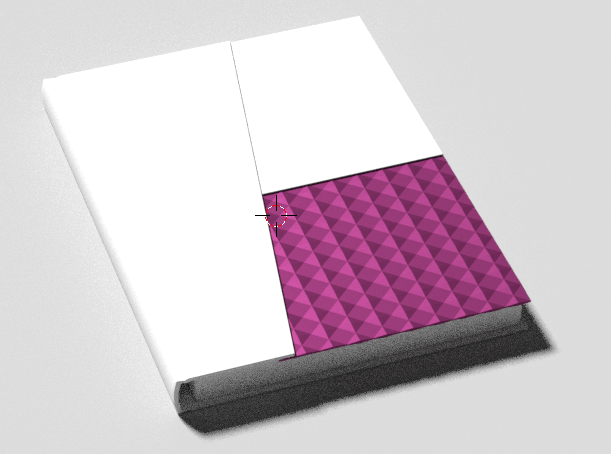
The book should now look like this.
Note: Better looking reflections can be achieved by rotating the light with (R)(R) and fiddling around a bit.
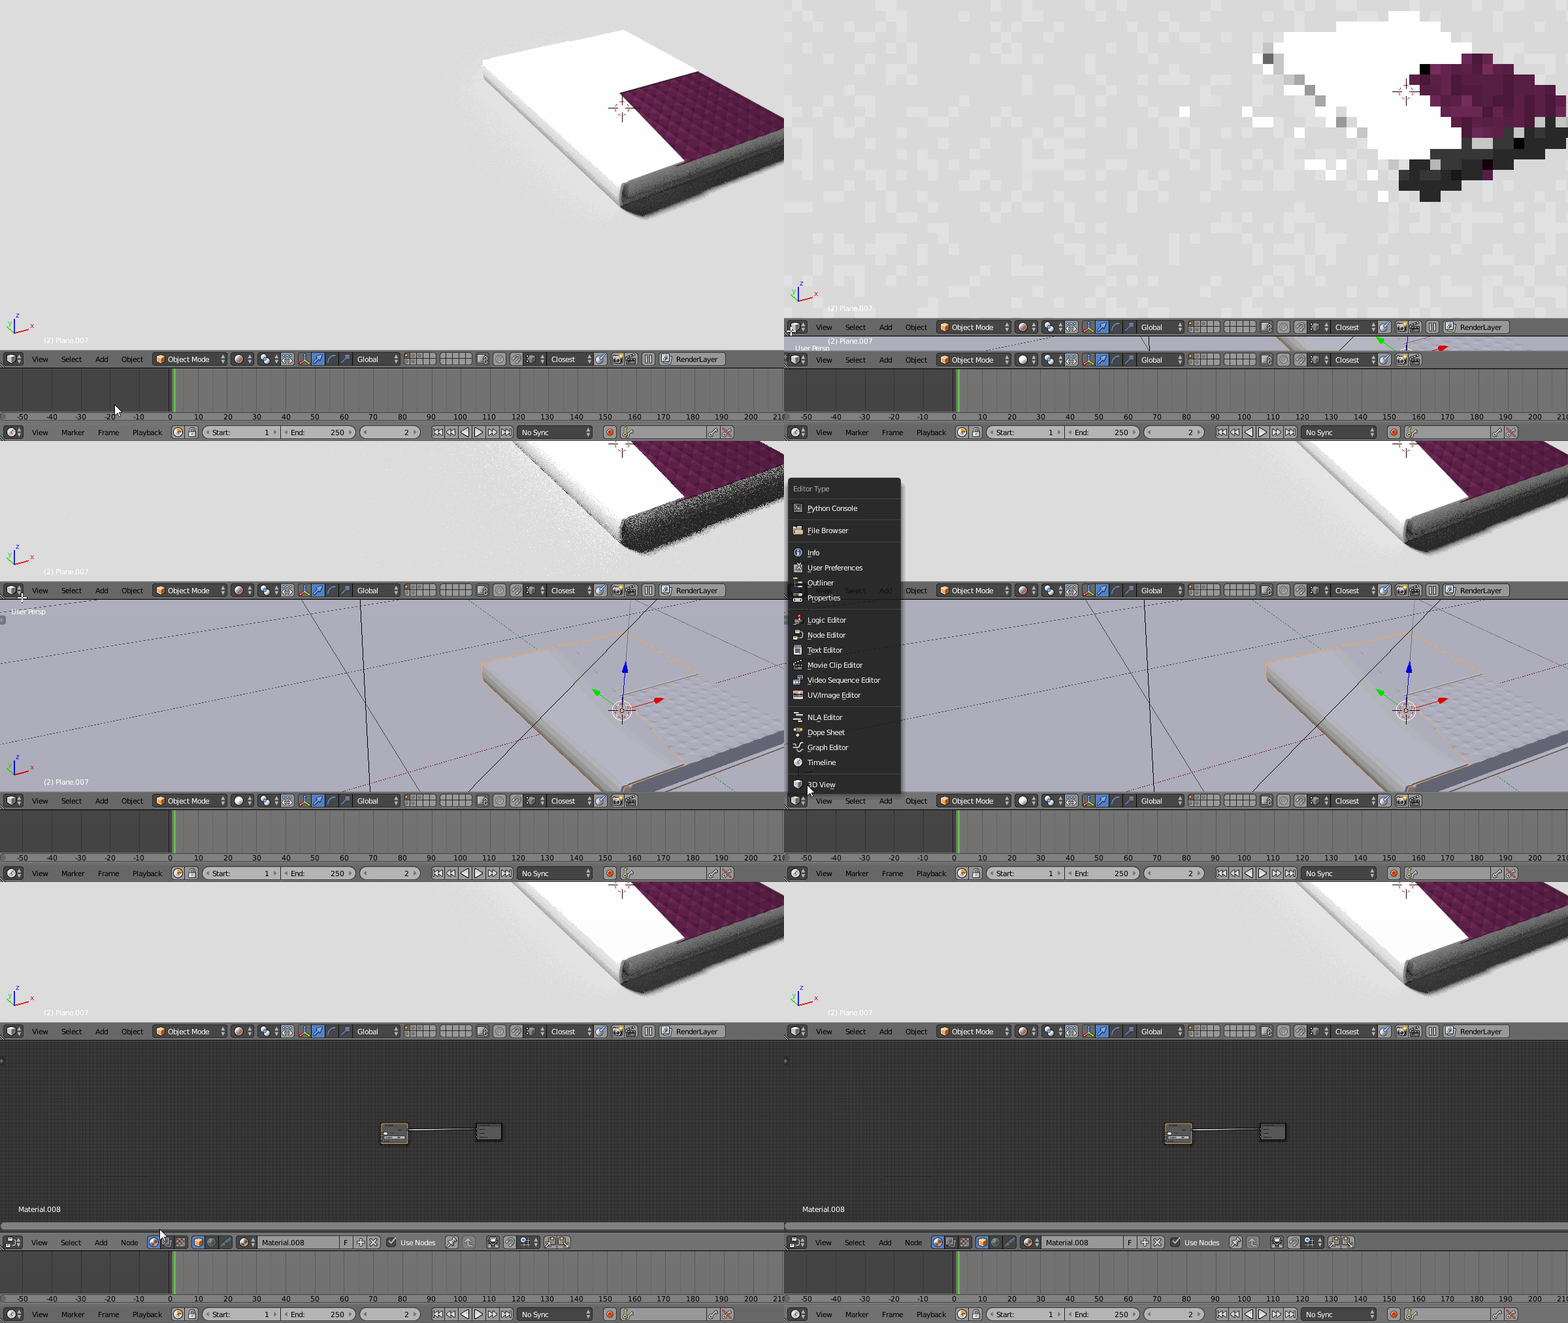
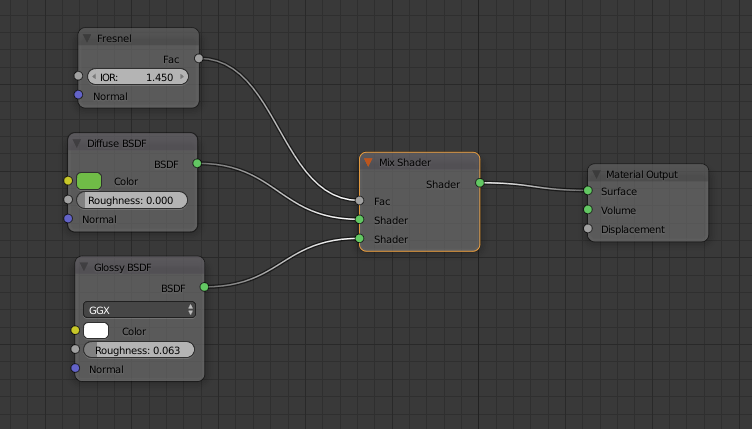
Now select the cover. Add a new material. Next enter the node editor:
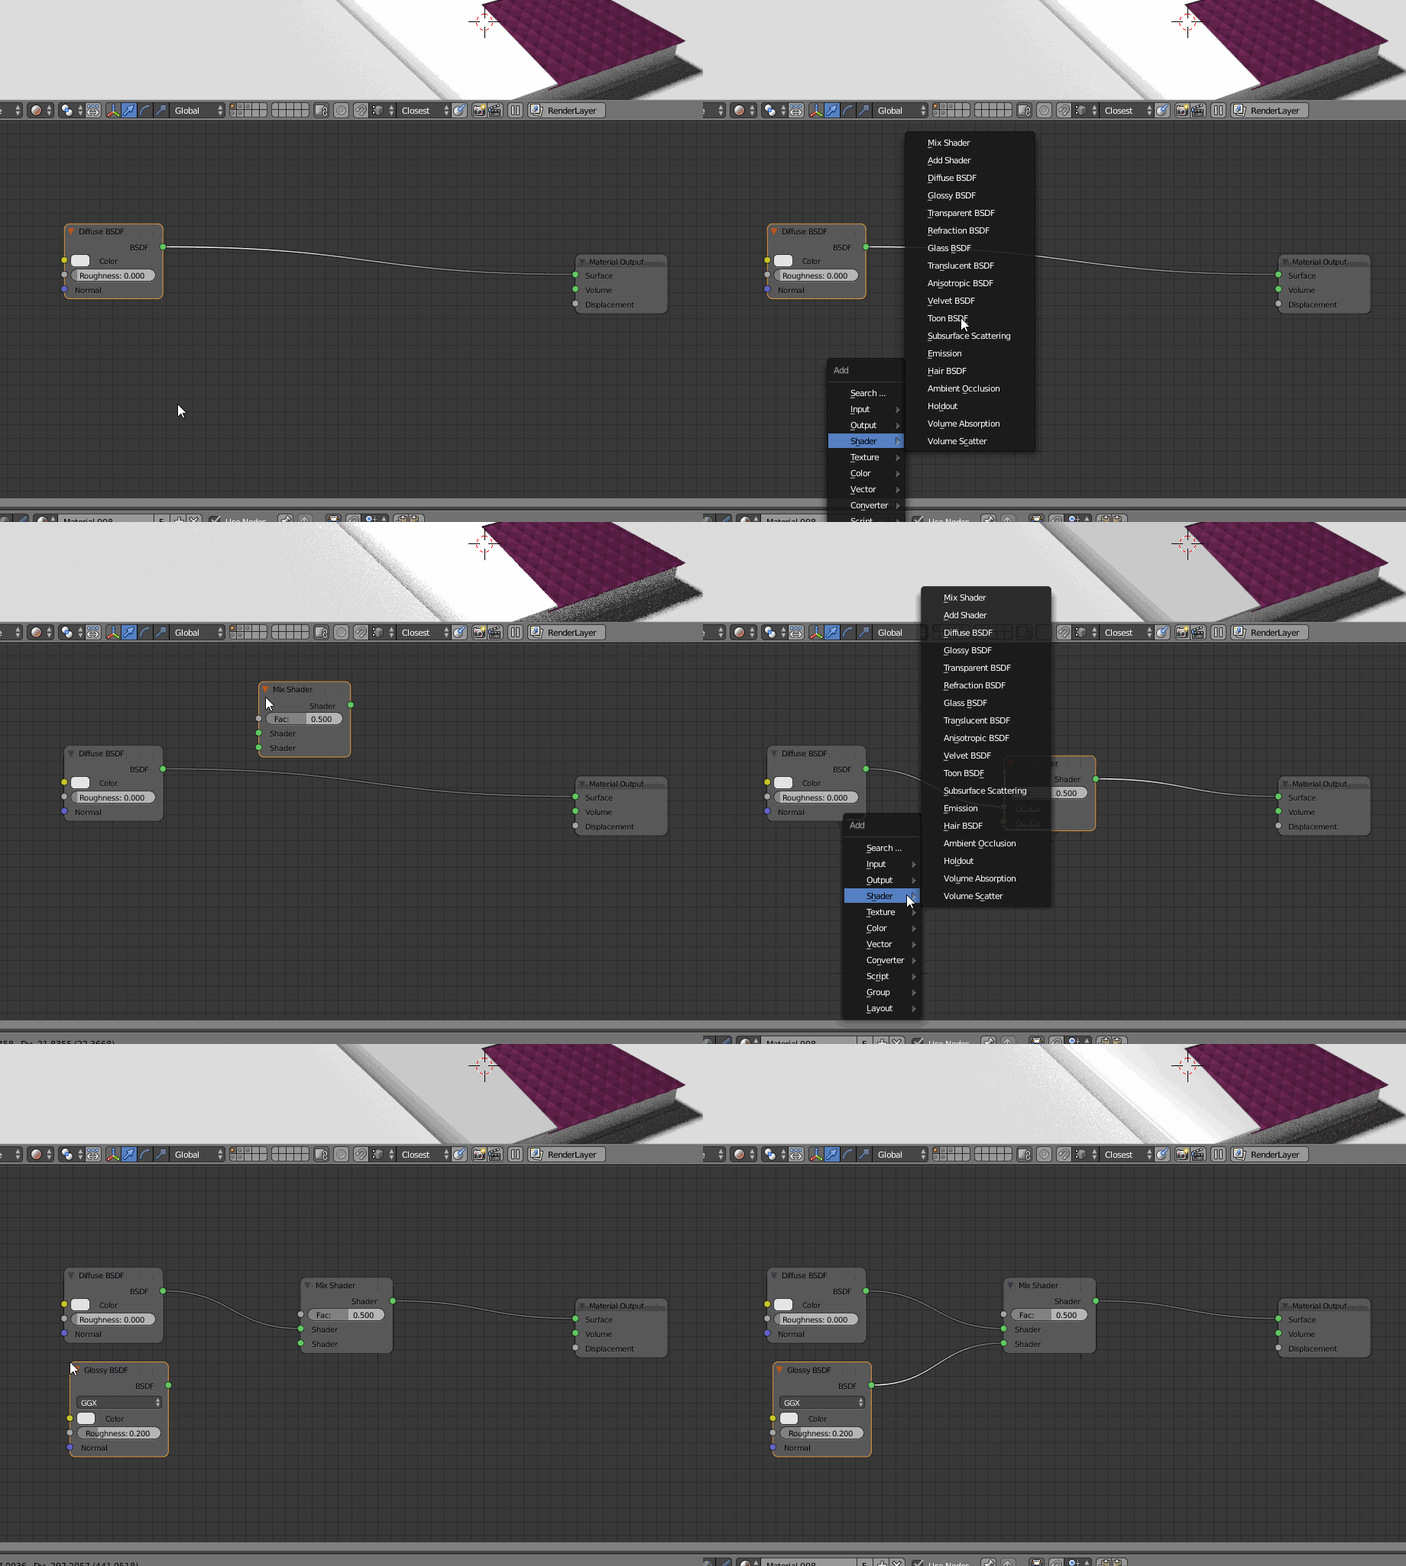
Using (Shift)-(A), add a mix shader node, and a glossy shader node, and join them:
Next add a Fresnel node (Shift)-(A)>Input>Fresnel, and connect it to the factor input in the mix shader node. The Fresnal node replicates a property of physical objects where they appear to be more reflective at a glancing angle.
Change the color of the diffuse node two green (The example uses #70BC47), and set the roughness of the glossy node to around 0.06.
The book should look something like this now:
It is now time to add the text onto the Jacket, using adobe photoshop. First however, the book must be unwrapped in blender.
Open a UV Image editor window:
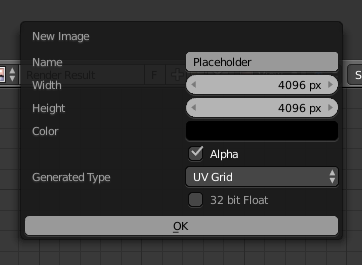
Next, click the plus sign to add a new image. Give it any name, and set the dimensions to 4096 * 4096, and set the generated type to UV Grid
Select Ok.
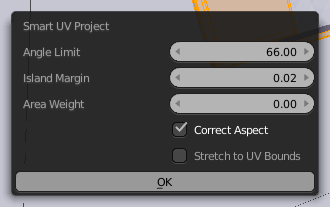
Next, select all the vertices on the book cover with (A). Hit (U)>Smart UV Project.
Select correct aspect (but not stretch to UV Bounds), and set the island margin to around 0.02.
Turn on link selection if it is not already enabled:
Ensure that all the vertices are selected on the object in edit mode. If they aren’t, all the information in the UV Editor will disappear.
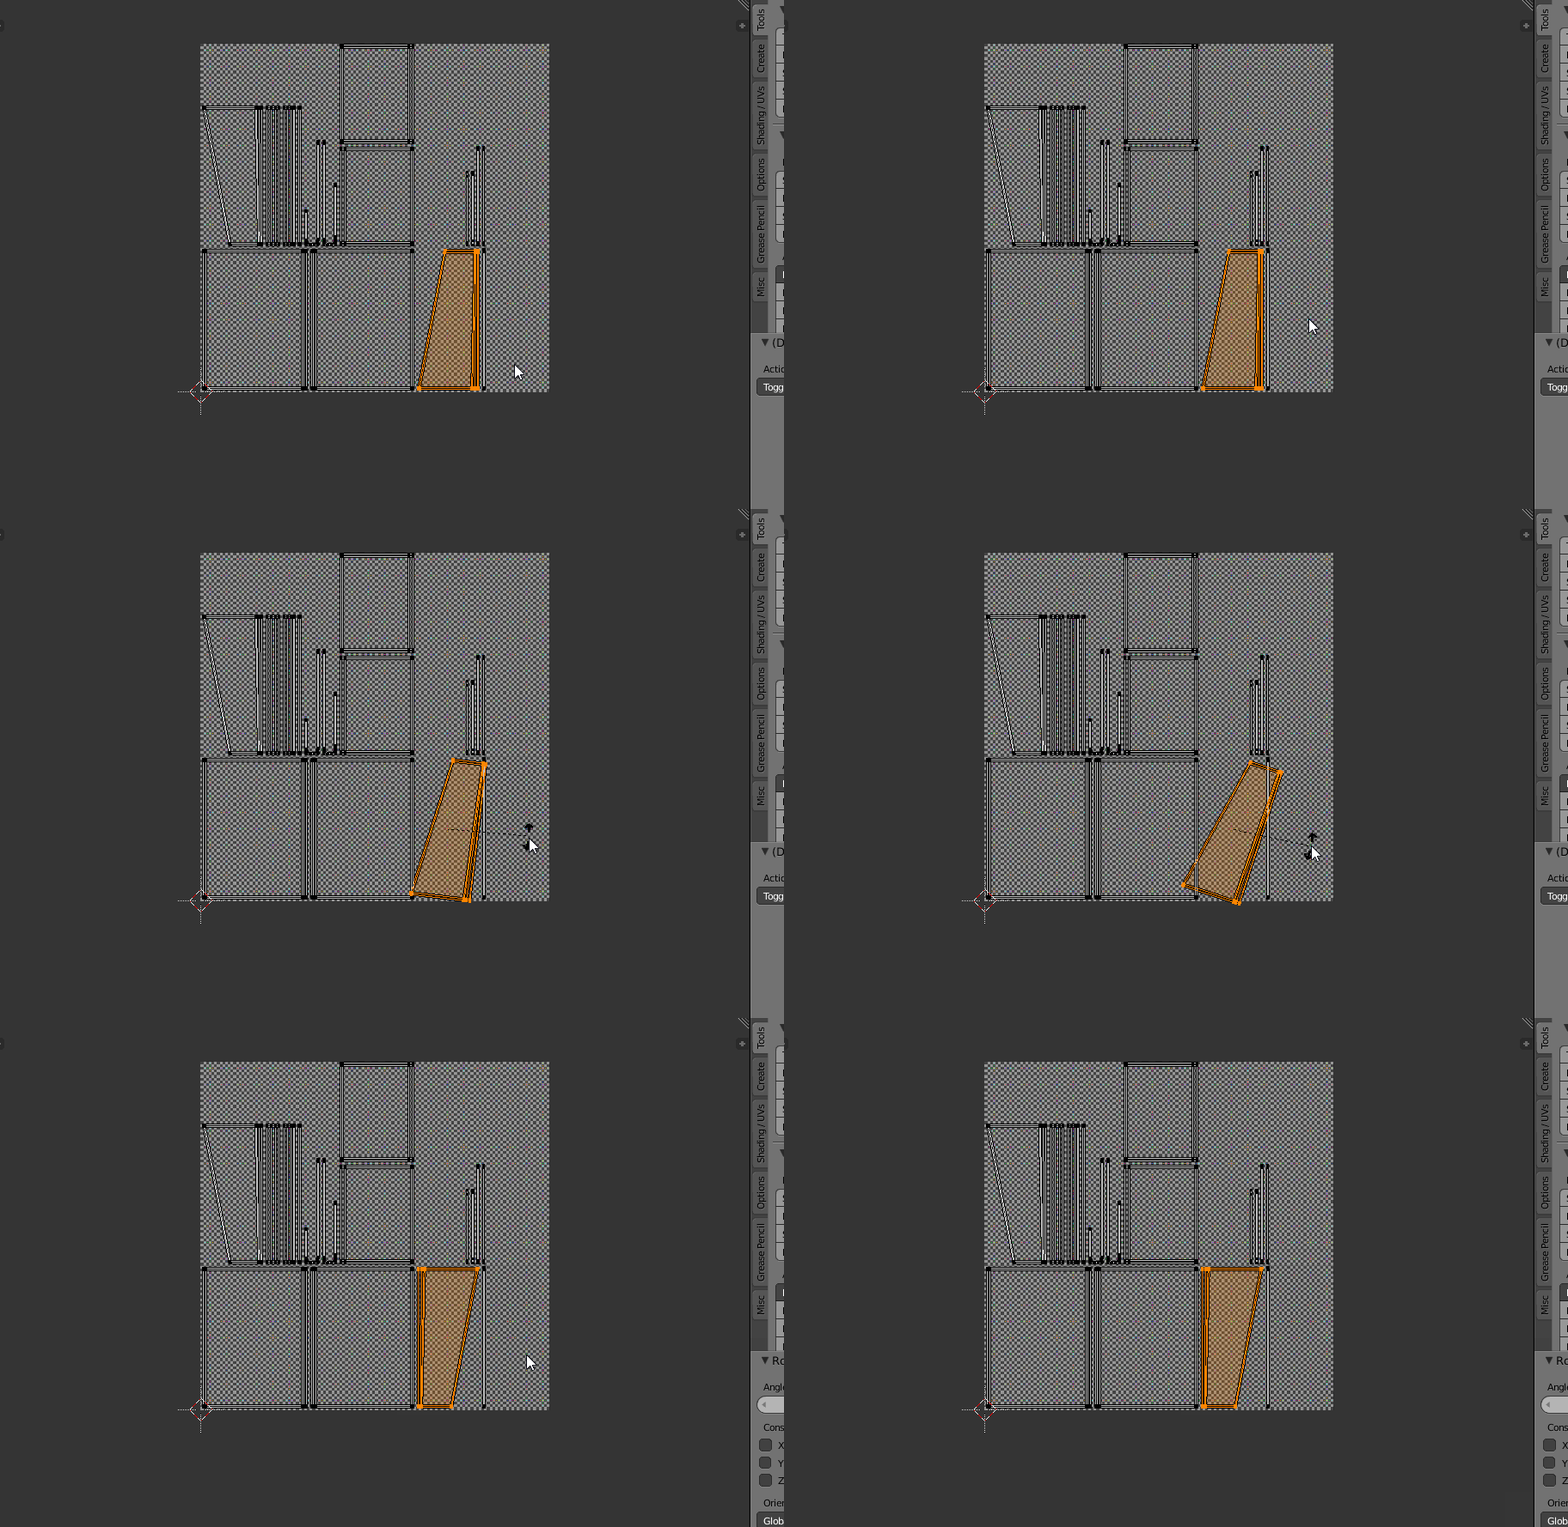
Look for the islands that correspond to the areas were the printed design will be added. Ensure they are oriented correctly. If they aren’t, select islands with (L), and rotate them using (R) and entering the number of degrees they need to be rotated.
Now it is time to export the layout to Photoshop, to be used as a guide in creating the cover design.
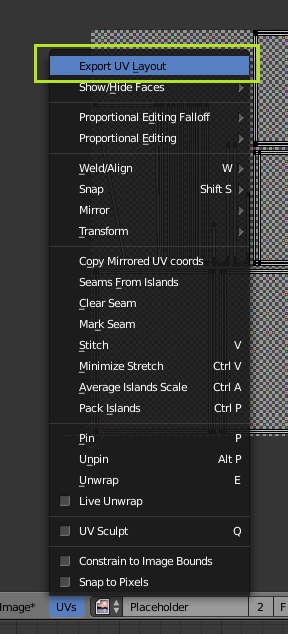
In the toolbar, go to UVs>Export UV Layout
Save the file somewhere it can be found.
Open the file in Photoshop. Add a background, for the color of the jacket. Add text and designs over top. Use the layout as a guide to where text will appear.
Once the layout has been completed to satisfaction, hide the guide layer, and save the file out as either a .psd or .png, based on preference (blender can read both formats).
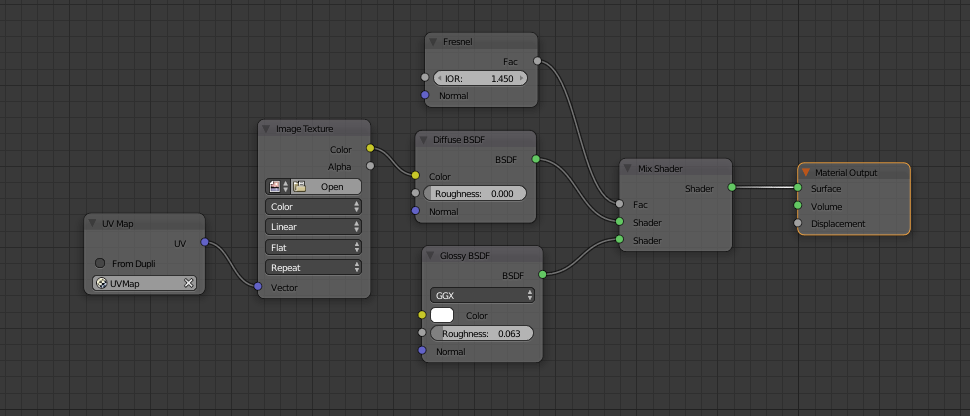
Back in blender’s note editor, add an Image Texture node (Shift)-(A)>Texture>Image Texture. Drag it into the color slot on the Diffuse shader node. Next, add a UV Map node (Shift)-(A)>Input>UV Map. And select the only UV map that appears in the drop down. Join the node to the matching vector input on the Image texture node:
Click open on the Image Texture node, and locate the layout from Photoshop, and select it.
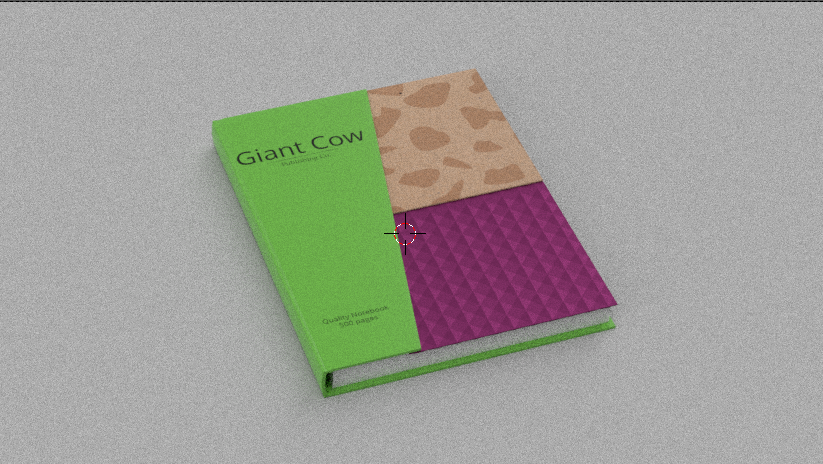
The book should now look like this:
The Final Portion of This tutorial, adding the cardboard inlay, will be added soon. I also intend to add a section on modeling the stationery to precise real-world scale values, and a section dedicated to creating stacks of thin paper, which provides a few unique challenges to beginners.




Comments